AROS One x86: A free AmigaOS-like operating system for PC.
"AROS Research Operating System (AROS, pronounced "AR-OS") is a free and open-source multi media centric implementation of the AmigaOS 3.1 application programming interface which is designed to be portable and flexible. As of 2021, ports are available for personal computers based on x86 and PowerPC, in native and hosted flavors, with other architectures in development. In a show of full circle development, AROS has been ported to the Motorola 68000 series (m68k) based Amiga 1200, and there is also an ARM port for the Raspberry Pi series.".
The paragraph above is how AROS is described in Wikipedia. AROS One is a complete desktop OS, including lots of multimedia, Internet, development, emulation, and other software. If you like to try out new things, you should give AROS a try. It installs so to say out of the box, with sound, video, and networking correctly functioning without having to do further configuration. I must say that I myself, I really like it!
This tutorial describes the installation of AROS One x86 2.5 on a VMware Workstation 16 virtual machine. My VM (Other OS; 32bit) has 1 CPU, 2 GB of RAM (too much, I think) and an 8GB IDE harddisk. It also has a floppy drive (that I removed later; floppy drives seem not to be supported?), a CD drive (needed for installation), a network card, and an USB2 controller. Display is configured with VMware default settings (no 3D), and the boot option is set to BIOS.
I downloaded the OS from the ArchiveOS website. To note, that the 2.5 version available at this site is not the latest release of the OS. In fact, on the AROS One site, there is a download link for version 2.6. If you want the latest release, try that one; if you prefer to follow this tutorial, just as it is published here and be 99% sure that the installation succeeds, use the ArchiveOS version.
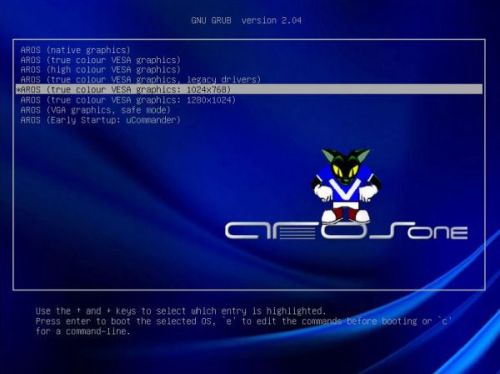
If your target computer has a floppy drive, you'll have to change the BIOS boot sequence: 1. CD-drive; 2. harddisk; 3. removable media. Then, you can boot from the installation DVD. The screenshot below shows the AROS boot menu. The default boot option (AROS true color VESA graphics: 1024×768) works fine.
 |
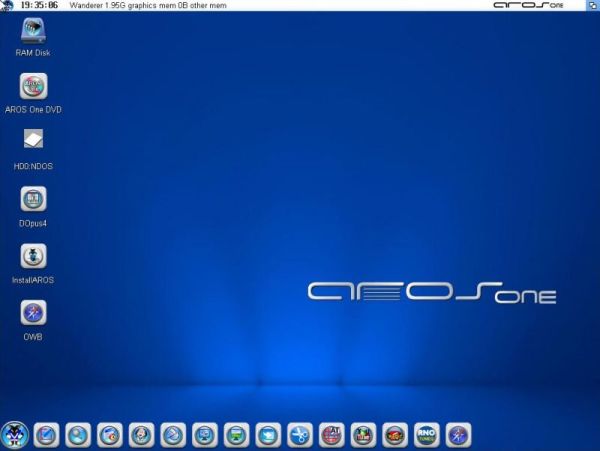
AROS boots into a Live system, so you can try out the OS if you are not sure if you want to install it. Otherwise, use the InstallAROS launcher to start setup.
 |
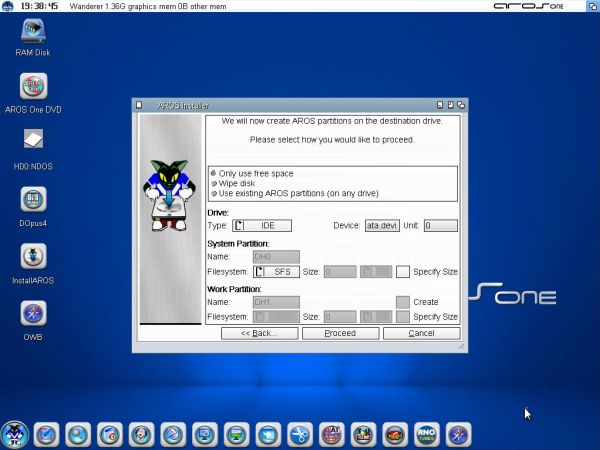
After the display of the Welcome screen, you are asked about the installation partition. The default selected is Only use free space, and this is fine (there is no need to wipe a new harddisk). You can let all input fields empty; default values will be used. If you want a work partition, however, the corresponding checkbox has to be selected (I actually forgot to do it...). Note, that the first partition on AROS is called DH0, the second DH1, etc, and that the partition will be formatted using the uncommon SFS filesystem.
 |
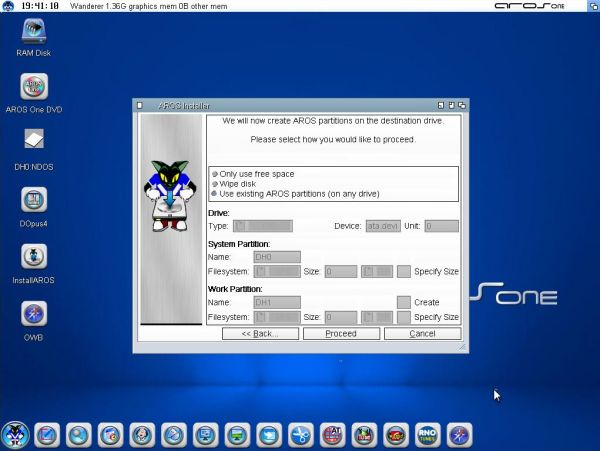
The partition is created, and you have to reboot the machine. The system starts up as before, with the boot and Welcome screen. Then, on the "choose partition" screen, you'll notice that the option Use existing AROS partitions has now be selected as default. Push the Proceed button to continue setup.
 |
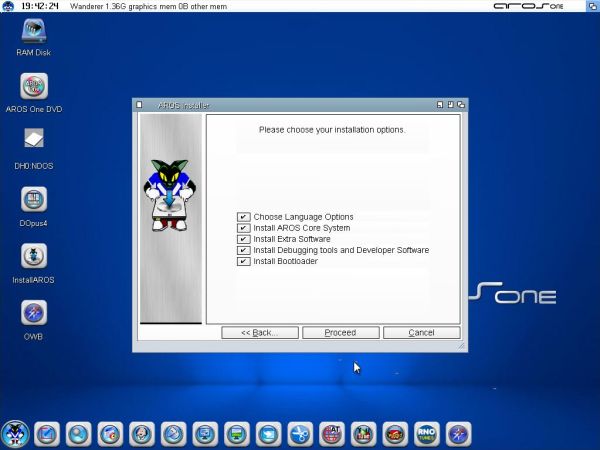
Now, you have to select the components that you want to install. "Language options" and "Debugger tools and developer software" are unselected by default. I think that, even if you don't intend to use these features, there is no reason not to install all components available. Just be sure that Install bootloader is selected!
 |
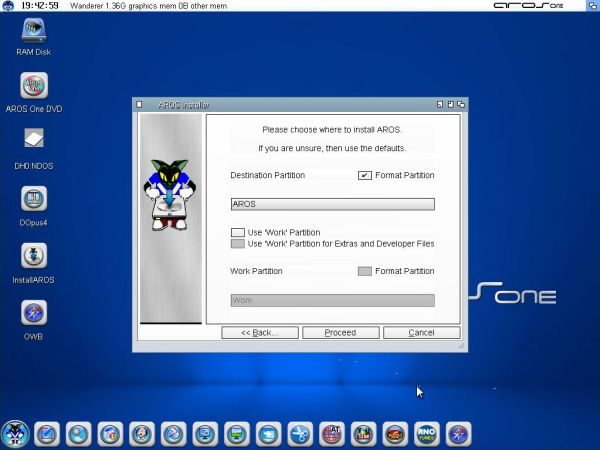
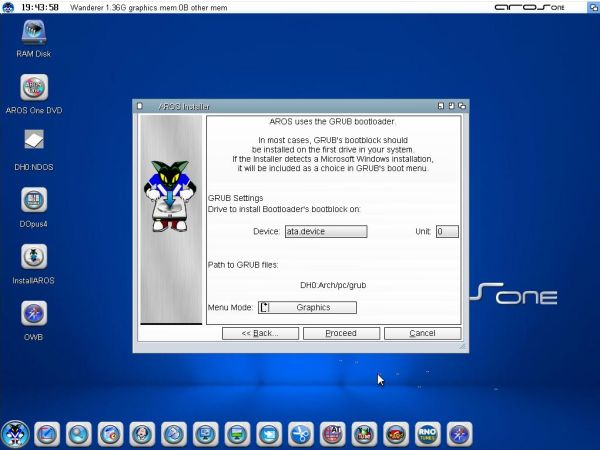
The next window is about the installation partition again. Obvious that it has to be DH0; be sure that the checkbox near "Format partition" is selected. The default label of the system partition is "AROS"; you can change it if you want (screenshot on the left). It follows a window about the installation of the bootloader (bootloader, that actually is GRUB, well known by Linux users). It has to be installed into the MBR of harddisk 0. Don't worry if you don't know what that is; the default settings of the setup program will install GRUB where it has to be installed (screenshot on the right).
 |
 |
Note: In the installation partition window, there is an option to use the work partition. This is only a valid option, if you did create a work partition before. As I said, I forgot to select the corresponding checkbox, so no work partition was created. Checking the "Use work partition" checkbox in the window shown above, led to the message Please insert volume DH1 in any drive during file copy. If you get this message, just push the Cancel button. Installation will continue normally (with no work partition, of course).
Pushing the Proceed button in the Ready to begin window, will start to transfer the system to the harddisk. First, you have to choose a keyboard layout; in my case a German keyboard (as a difference with several other operating systems, this works correctly for umlauts and accents). Then, you must choose a locale. I chose English as (main) language, Lëtzebuerg (yes, they offer the choice in Luxembourgish!) as country/region, and UTF8 as default character set. On the Timezone tab, Rome (CET) would have been the best choice for Western Europe, I guess (I chose Paris, what should be the same). Concerning the hardware clock, I made a mistake by checking "Hardware clock stores UTC". With time synchronization with the host being enabled in VMware Workstation, the hardware clock has to store the local time on a Windows host!
Now, the files are copied from the DVD to the harddisk. When done, you are told to remove the DVD and to reboot the computer.
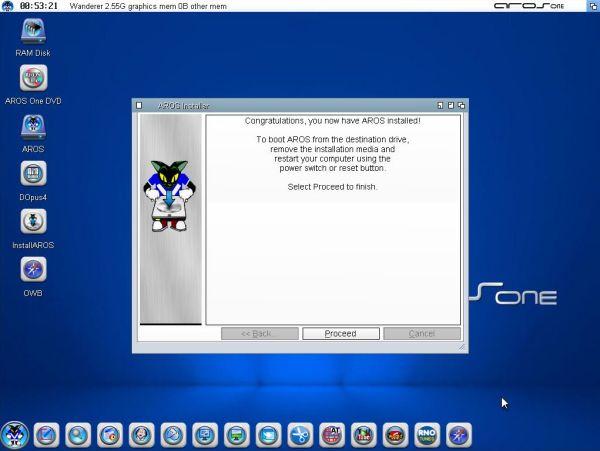 |
Important note: To reboot here, use CTRL+ALT+DEL (this will actually shut down, not reboot the machine). In fact, rebooting using the corresponding entry in the AROS "Start menu" does not work! In everyday usage, to reboot the computer, use Shutdown, and then restart the machine using the power button.
When the installation is done, you should re-change the BIOS boot sequence: 1. harddisk; 2. CD-drive; 3. removable media.
The GRUB boot menu is the same as the one when booting from the DVD. As I use to run my virtual machines in windowed mode, I actually use AROS with a 1024×768 pixels screen resolution, because the alternate configuration of 1280×1024 is to high for the screen of my laptop. However, I tried out this resolution, and it works fine. Thus, if you consider the 1024×768 pixels screen to small, you can boot using the AROS (true color VESA graphics: 1280×1024) option.
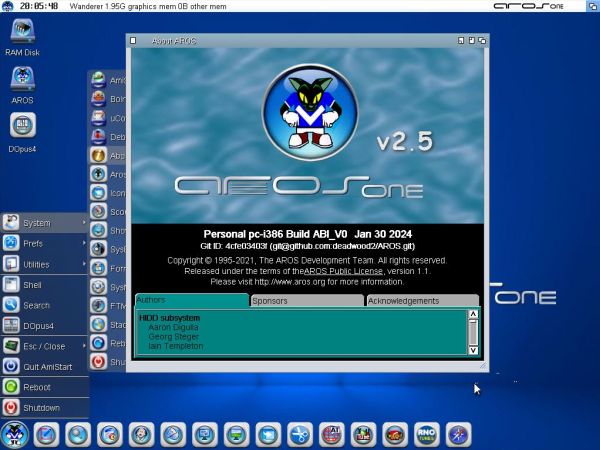
The screenshot below shows the AROS desktop (by the way, note that the desktop system used by AROS is called Wanderer).
 |
If you find this text helpful, please, support me and this website by signing my guestbook.