ReactOS: An open-source Windows-binary-compatible operating system.
"ReactOS is a free and open-source operating system for i586/amd64 personal computers that is intended to be binary-compatible with computer programs and device drivers developed for Windows Server 2003 and later versions of Microsoft Windows. ReactOS has been noted as a potential open-source drop-in replacement for Windows and has been of interest for its information on undocumented Windows APIs.".
The paragraph above is how ReactOS is described in Wikipedia. An "open-source Windows" - that's sounds amazing! However, the reality seems to be far away from the dream, and personally, I must say that I was rather disappointed when trying out this OS as a virtual machine on my VMware Workstation 16.
Some important facts that you should know, before installing ReactOS:
- The development of ReactOS has been started in 1996, with the intention to create a replacement for Windows XP/Windows Server 2003. Meanwhile, Microsoft has released 5 further operating systems, thus ReactOS has to be considered as compatible with a very old Windows, and will only run old versions of Windows software.
- ReactOS is under development for over 25 years, but is actually (end 2025) still in alpha. I can imagine that writing "your own Windows" is extremely complex, but 25 years without at least some really working prerelease - that seems somewhat poor to me.
- Still being alpha software, the implementation of the OS is incomplete, there are lots of features that are still missing, or that do not work correctly. This means, that first, it would be totally unreasonable to run ReactOS in a "real world" situation, and second that you must be prepared that what you try out might not work or not work correctly.
- I encountered problems with several features, that I would call "essential" for an operating system anno 2025:
- The OS actually starts with auto-login. There is a webpage, that explains how to change this, but this seems complicated, and is said not really to work as it should.
- The OS uses FAT32 as file system. Trying to access an NTFS drive, I got an empty directory in one case, the system hanging in another one.
- USB (I tried USB2) works, but accessing such a device regularly makes the system hang.
- I did not succeed to get sound on my ReactOS VMware virtual machine.
- File Explorer showed some strange behavior when working with folders: Trying to copy a folder results in an error, and you have to create the destination directory and then copy the files. Deleting a folder only shows this folder gone after you refresh the window content.
- The good news is that the network seems to work fine. The bad news is that if you configure your network manually, it is reset to DHCP when you reboot.
Considering all this, I would say that ReactOS (in its actual state) is not of a real use for mainstream users. On the other hand, for people who like to try out new things (new operating systems), the OS can be of interest.
ReactOS can be downloaded from the ReactOS Project website. The OS version, used for this tutorial, is ReactOS 0.4.15. The download is a bootable ISO image, that you can mount in your virtual CD-drive (or in VMware).
Note: When creating your virtual machine, please, consider the following:
- The ReactOS developers recommend to set the operating system to "Windows XP".
- 1 GB of RAM should be a reasonable choice.
- It is mandatory to choose buslogic IDE as harddisk type. As Windows XP and Windows Server 2003, ReactOS does not support SCSI drives. I chose a disk size of 20 GB.
- The boot type has to be set to BIOS (what is anyway the default for a VMware Windows XP machine).
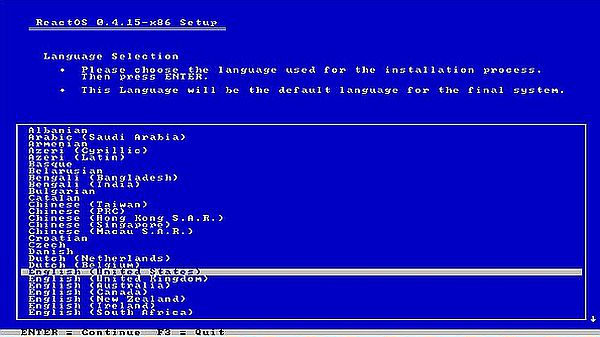
The installation of ReactOS works well and shouldn't cause any issue. However, for lots of people, the 50 lines per screen display, used by the text-based installer, will make it really hard to see what's actually written there. Simple work-around: Take a screenshot of the VM, and use zoom-in in your image viewer to get a larger text size. The screenshot shows the selection of the national language. I let the default: English (US).
 |
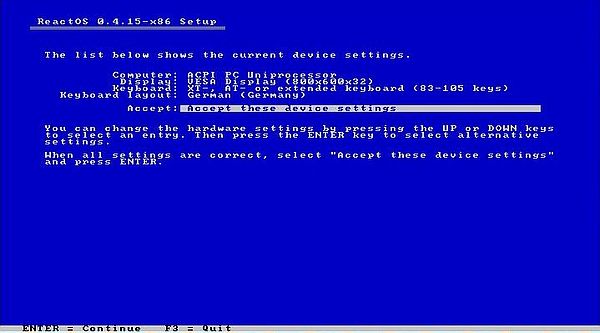
After the display of a Welcome screen and the display of a warning that ReactOS is still alpha, you get to a screen with some general device settings options. Use the up and down arrows to select an option and hit ENTER to change the default values; I set the keyboard to "German (Germany)". When done, select Accept these device settings and hit ENTER to pass to the next screen.
 |
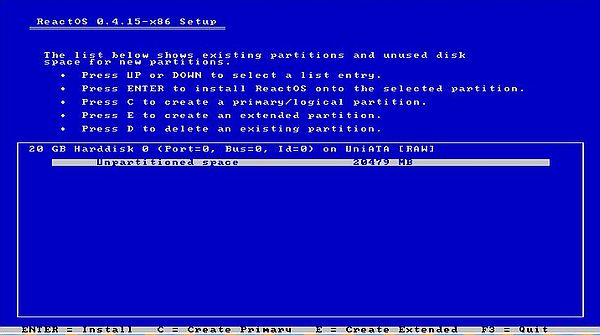
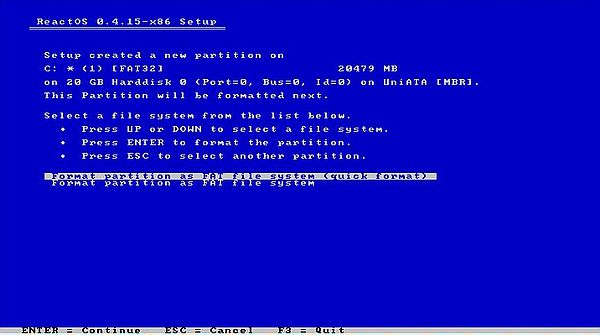
The following screens are about partitioning. First, you have to select where to install ReactOS. The default is to use the unpartitioned space on harddisk 0, what means creating a partition with the size of the disk and install the OS to there (screenshot on the left). Then, you have to choose a file system; not really a choice, as the only option is FAT (in fact it's FAT32 that will be used) (screenshot on the right).
|
|
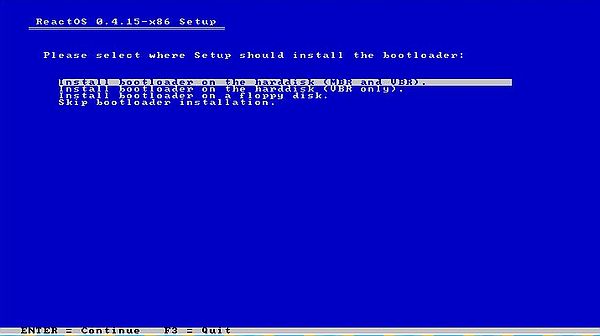
After a confirmation screen, the partition is formatted. Then, you are asked where to install the bootloader. The default option is to install it into the MBR. If you want your OS to be bootable from the harddisk, this is mandatory!
 |
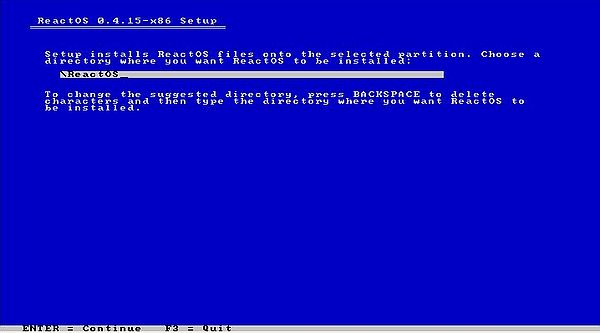
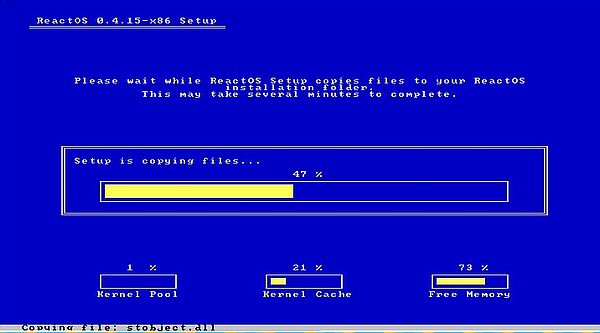
Finally, you have to choose an installation directory; the default is C:\ReactOS (screenshot on the left). Ready to go now. The screenshot on the right shows how files are copied from the CDROM to the harddisk.
|
|
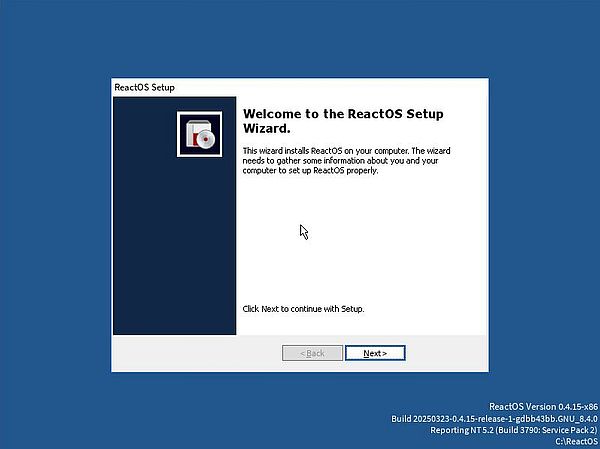
The computer is rebooted. ReactOS starts up, booting into the desktop. At first boot, the ReactOS Setup Wizard is launched.
 |
After the display of an informational screen, you have to choose how to configure your ReactOS: Either as a server, or as a as a workstation.
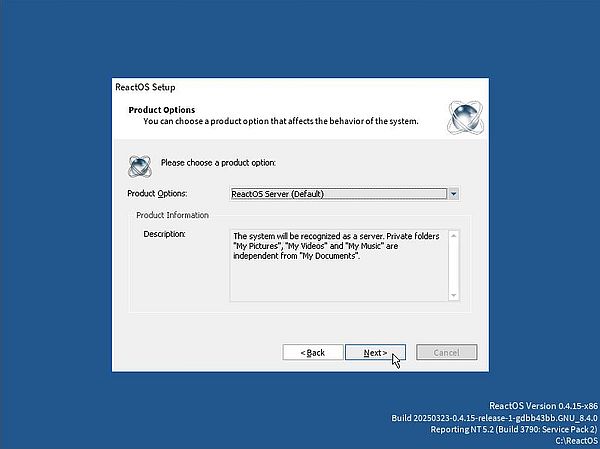 |
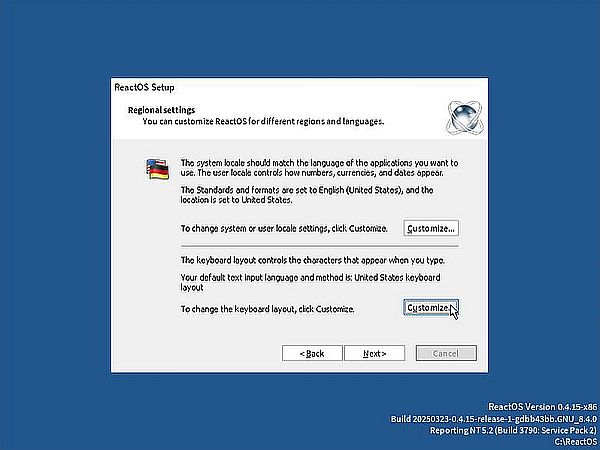
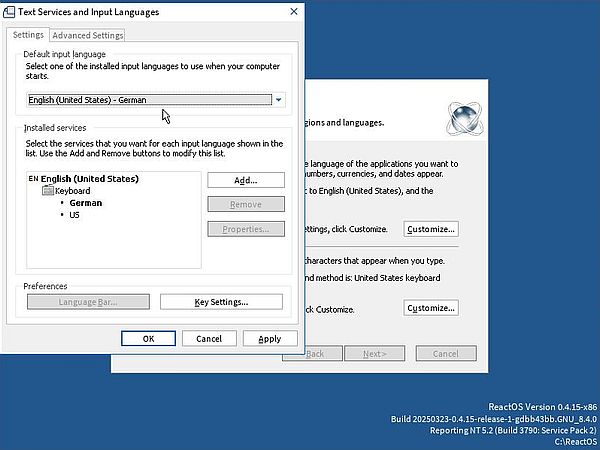
The wizard continues with the configuration of the Regional Settings (screenshot on the left). The keyboard layout, that you choose at the beginning of the installation, is not automatically added, thus I had to add the German keyboard here. To add another keyboard layout, push the Customize button at the bottom of the page. This opens the Text Services and Input Languages window. Push the Add button to add a new input language, and in the opening dialog box, choose "English (United States)" as input language and "German" as keyboard layout (in my case). Hit the OK button to return to the Text Services and Input Languages window, where the new keyboard has been added. And finally, choose "English (United States) - German" from the default input language combobox (screenshot on the right).
|
|
Notes:
- After installation, I removed the input method "English (United States) - US". You may let both methods, if you prefer.
- If you live in Europe, you might want to configure date and number formats independently of the input methods available. You can do this later in Control Panel...
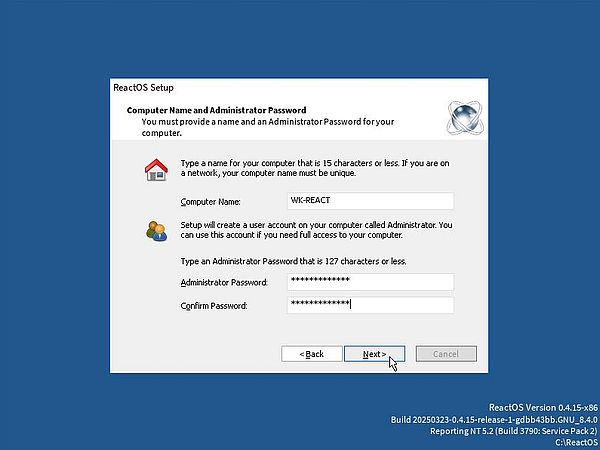
On the next screen, you are asked to enter your full name, and (optionally) the name of your organization. Then you have to enter the computer name (I chose "WK-REACT"), and the password for user "Administrator" (as in Windows XP/Server 2003, that's the default local user).
 |
Setup continues with date and time configuration. You will probably have to change the time zone. For Luxembourg, this is one of the "GMT+01:00" options. Also check if the "Automatically adjust clock for daylight setting changes" is selected, if this applies in your country.
You can choose between several themes to configure the appearance of your desktop. I let the default.
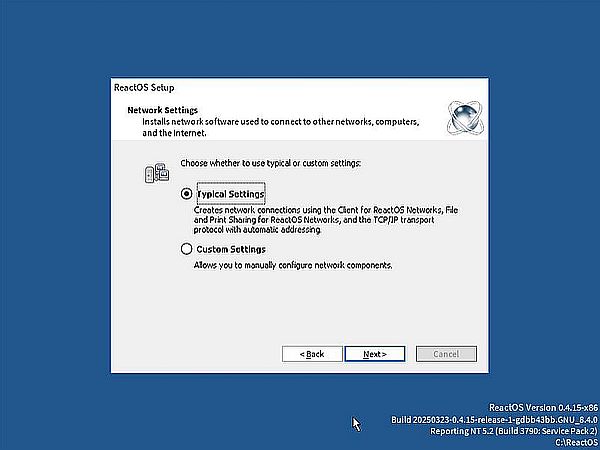
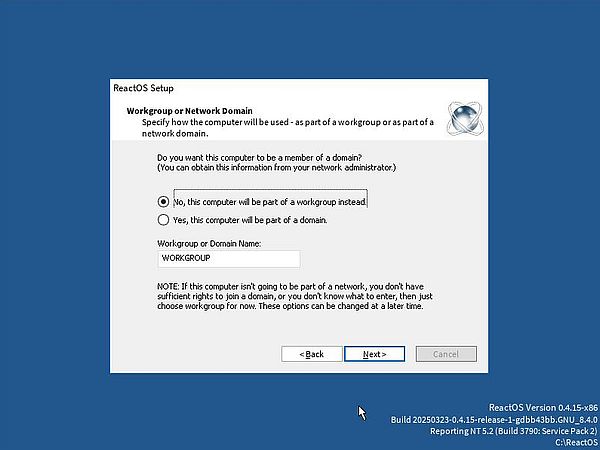
Setup continues with the network configuration. On the first screen, you can choose between Typical settings and Custom settings (screenshot on the left). On the second screen, you can choose if your computer is part of a Workgroup, or if it is part of a Domain (screenshot on the right).
|
|
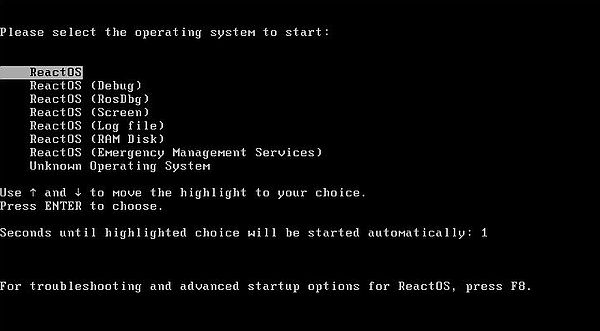
The wizard terminates, and the system reboots with a rather interesting boot menu.
 |
When rebooting here, ReactOS finds two new devices ("System device" and "Multimedia Audio device"). The automatic installation of a driver for these devices fails. The only issue with this is that the corresponding features will not be available. Note that these devices will be listed as "Other devices" in Device Manager.
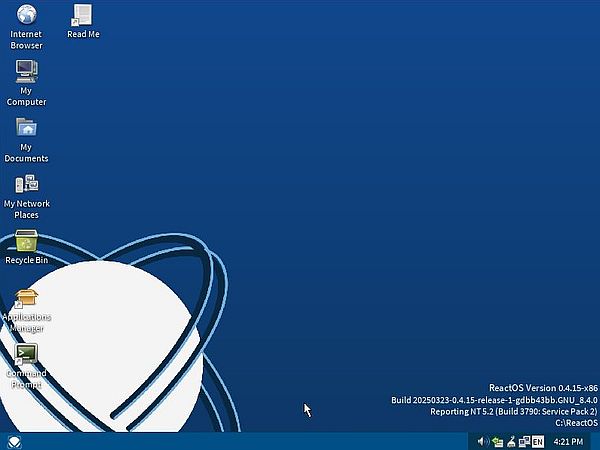
The screenshot shows my ReactOS desktop after installation of the operating system.
 |
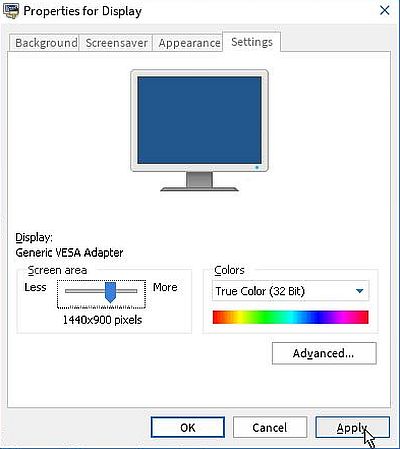
I did not try to install VMware Tools. ReactOS seems to run rather smoothly without them. In particular, you can set a high resolution screen display. To set a new screen resolution, right-click the desktop, and from the popup menu choose Display Settings. Use the trackbar to set the desired size of the Screen Area. As with all my virtual machines, I chose 1440x900 pixels.
 |
My ReactOS VMware virtual machine actually has a floppy drive. The floppy controller is recognized in Device Manager, however I did not succeed to access the drive. It is not shown in File Explorer, and trying to access drive A: in Command Prompt, results in the error message Invalid drive (?).
My experiences with USB drives on ReactOS are rather bad. Normally, connecting a USB stick is ok, and if it is formatted using the FAT32 file system, the files on it are accessible and the drive can also be written to (I did not succeed to open files on an NTFS drive; I did not try the extFAT format). However, sometimes, there is a problem, and trying to access the drive makes that the computer hangs. I think that this happens when after having shut down the computer with an USB drive connected, I reboot without the drive, and then connect the drive. Work-around: Reboot after you have connected the drive (maybe, that disconnecting the drive before shutting down would also help?).
I made several efforts in order to make sound work. With one of the drivers, that I tried, the "Multimedia Audio device" in Device Manager was removed from the "Other devices" group and was now listed in a new group called "Audio & Videocontroller" as "VMware VMaudio (VMAUDIO) (WDMI)". However, trying to play a WAV file just opened the player, remaining positioned at the start of the file. Trying to play an MP3 or AVI file resulted in an error message.
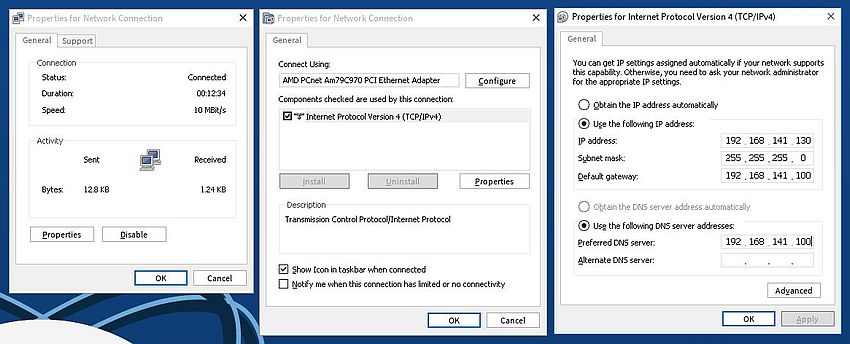
To terminate the tutorial, a positive fact: Network connectivity works fine (even though a manual configuration will be reset to DHCP when rebooting). Manual network connection is done exactly the same way that you would do on Windows. The screenshot shows how I set the IP address to 192.168.141.130, and the default gateway to 192.168.141.100 (my Windows Server 2003 machine, that actually runs a DNS server).
 |
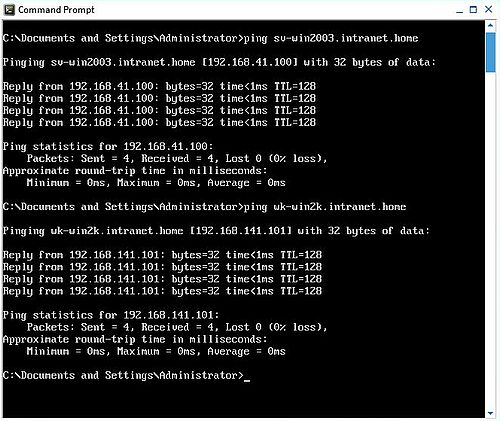
The screenshot below shows how I successfully pinged the external IP of my Windows Server 2003 machine and a Windows 2000 workstation, that is part of the 192.168.141.0/24 network, using their DNS names ("intranet.home" being the name of the DNS domain).
 |
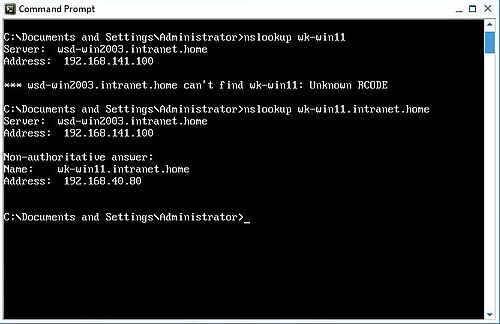
DNS resolution works, however, the domain suffix seems not to be automatically added (I added the suffix "intranet.home" to the network configuration settings). As you can see on the screenshot below, using the fully qualified DNS name works fine with the nslookup tool.
 |
If you find this text helpful, please, support me and this website by signing my guestbook.