MySQL database development on Windows XP.
This tutorial is about installing MySQL 5 on Windows XP (32-bit). The tutorial uses MySQL 5.0. Here is the direct link to download the MySQL Server from atksolutions.com. The tutorial also describes MySQL Administrator and MySQL Query Browser; here is the direct link to download the MySQL GUI Tools.
Important: The installation of MySQL may fail because the setup program does not succeed in starting the service. This happened on my system due to the fact that the server start was blocked by Outpost Firewall. To avoid all problems, I would suggest to disable your Windows firewall during the installation of the MySQL Server. Probably not necessary, but I also disabled my antivirus software until MySQL was installed and the server running.
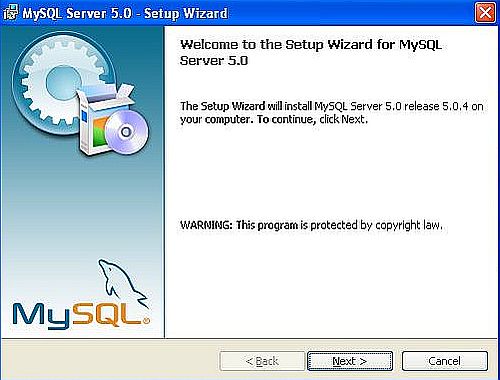
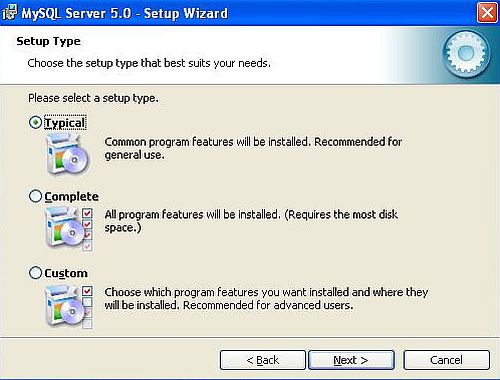
The screenshot on the left shows the MySQL Server installation Welcome screen. The screenshot on the right shows how I chose to perform a typical installation.
|
|
On the next screen, you can either proceed with the installation (push the Install button), or going back to change your settings (push the Back button). Finally, there is a screen where you can create a MySQL account or login to an existing account. Select the Skip Sign-Up button to finish the installation.
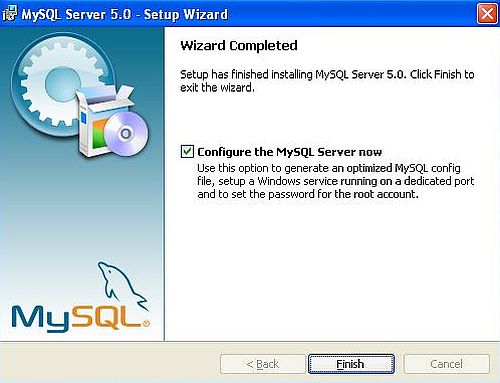
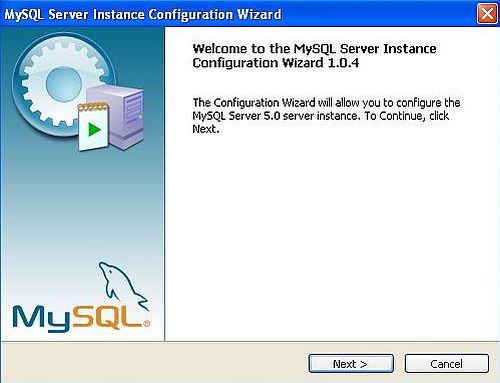
Be sure that on the last screen of the setup program, the checkbox Configure the MySQL Server now is selected when you push the Finish button (screenshot on the left). This will start the MySQL Server instance configuration wizard (screenshot on the right).
|
|
Select to perform a detailed configuration of the server. Choosing the standard configuration would be ok in most cases; performing the detailed one has the advantage that you can (re)view all configuration options and the actually made settings.
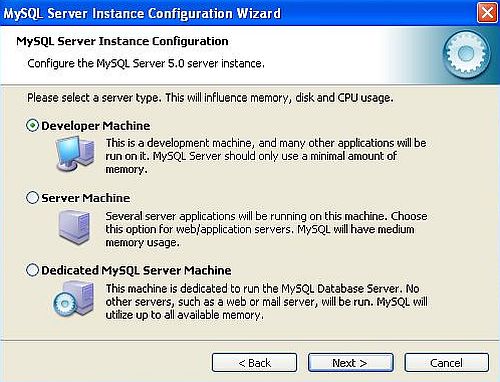
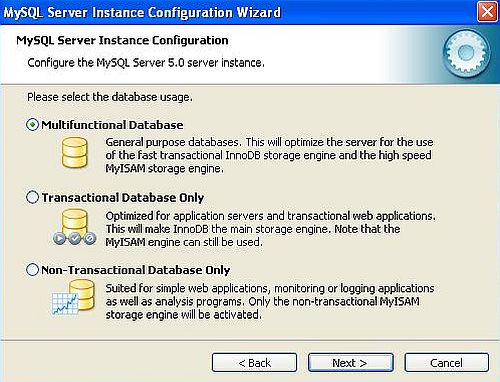
Server type = Developer machine (screenshot on the left) and Database usage = Multifunctional database, i.e. optimization for both InnoDB and MyISAM (screenshot on the right) are the "normal" settings to choose on a workstation machine.
|
|
In the next windows, you must select the drive and path for the InnoDB tablespace (the default location is the MySQL installation path on the C: drive), resp. choose between decision support (DSS/OLAP) and online transaction processing (OLTP). In a "normal" situation (up to 20 concurrent connections), DSS/OLAP is ok.
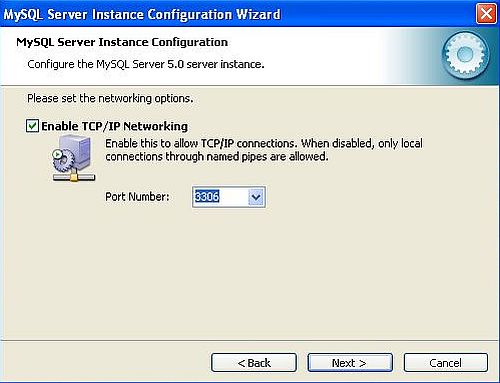
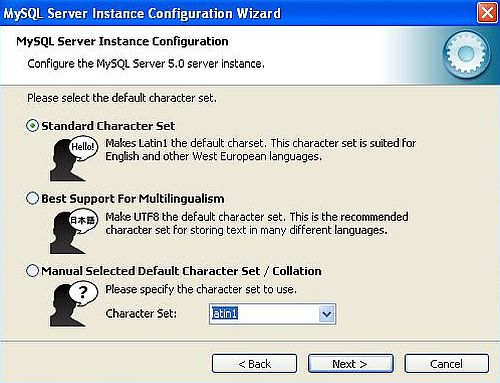
Two important settings to make in the following two windows. First, be sure that TCP/IP networking is enabled. By default, the MySQL server listens on port 3306 (you should let this value, unless you run several MySQL/MariaDB servers on your machine) (screenshot on the left). Then, you have to choose a default character set. On modern Windows releases, UTF8 would be the obvious choice. On Windows XP (with limited support for UTF8), selecting the standard character set (Latin1) might be the better choice (unless you intend to mostly store documents in languages that include characters that are not available with Latin1; anyway, you can always choose a custom character set for a given database) (screenshot on the right).
|
|
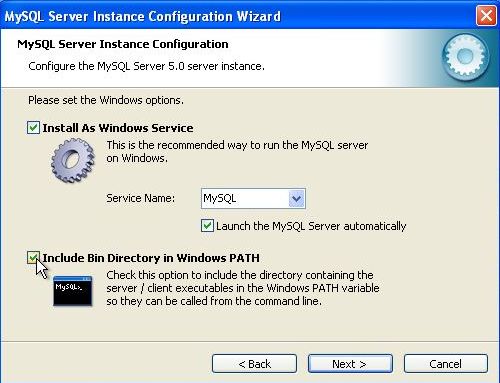
Another important setting has to be made in the following window. Even though it is possible to run MySQL 5 as an application, you should absolutely install MySQL as a service (what actually is the default setting). If you want the MySQL service to start when you start Windows, select the corresponding checkbox. Finally, select the Include BIN directory into Windows PATH checkbox (unselected by default). This will allow you to run the MySQL command line tools from any directory.
|
One last setting to be made: Setting the root password. If you use MySQL as a local database on your Windows XP (what you probably do), the password strength has no importance. Important on the other hand, however, not to forget the password that you enter here!
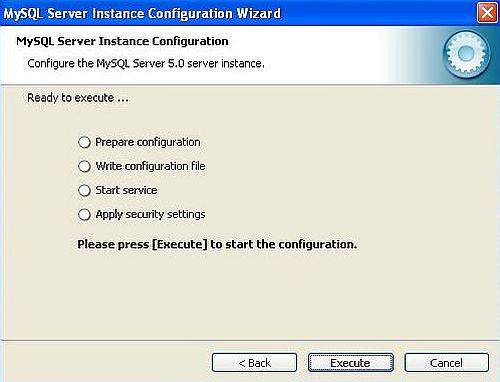
The wizard has now all information that it needs to execute the configuration of the MySQL server instance. In the "to do" summary window, push the Execute button to launch the server configuration.
|
The configuration should succeed and the wizard terminate. As I said at the beginning of the tutorial, should the installation of the service fail, the probable reason is that it was blocked by your personal firewall.
The MySQL installation files include the mysql client, a command line tool that allows to work with MySQL database objects and data (it includes
other command line tools, as well...). To launch mysql in Command Prompt and connect to the MySQL database "mysql" (included with all MySQL
installs), run the following command:
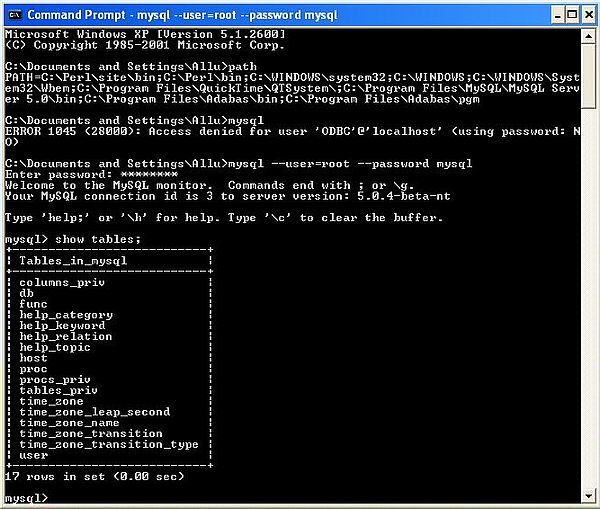
mysql --user=root --password mysql
The "mysql" at the end of the command is the database that we want to connect to, the password for user root will be asked for.
After successful connection, we can enter SQL statements, as for example:
show tables;
select count(*) from help_category;
The screenshot shows how I started the client (connecting to the "mysql" database) and displayed this database's tables.
|
Installing and running the MySQL GUI Tools.
The installation of the MySQL GUI Tools is optional. You can use the command line tools instead. If you have installed PHP, another possibility is to install the web-based interface PHPMyAdmin.
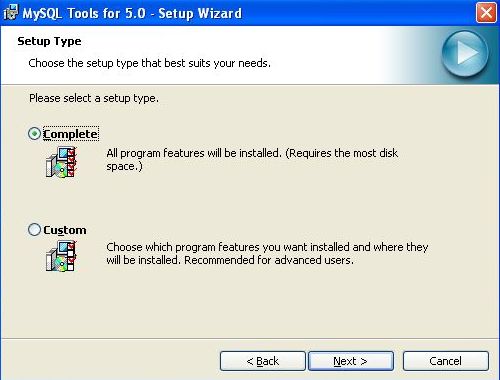
The MySQL GUI Tools download file is a windows installer (MSI). The installation should succeed without issues; by default the software is installed in a subfolder of the MySQL installation directory. The screenshot shows how I chose to perform a complete installation.
|
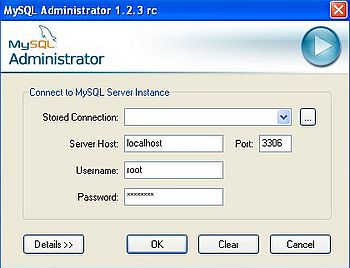
MySQL Administrator is used to manage the MySQL Server, the databases, and the users, that may access the databases. Normally, you must be the root user to use this tool. The screenshot shows the MySQL Administrator login screen.
|
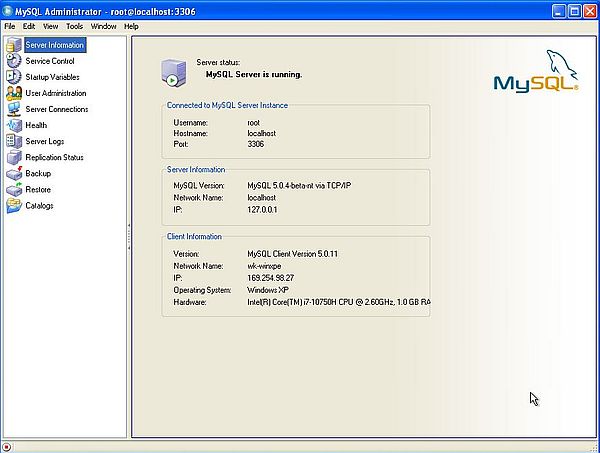
The entry page of MySQL Administrator shows the server status. You can see on the screenshot that the server is running on localhost (IP 127.0.0.1) and listening at default port 3306.
|
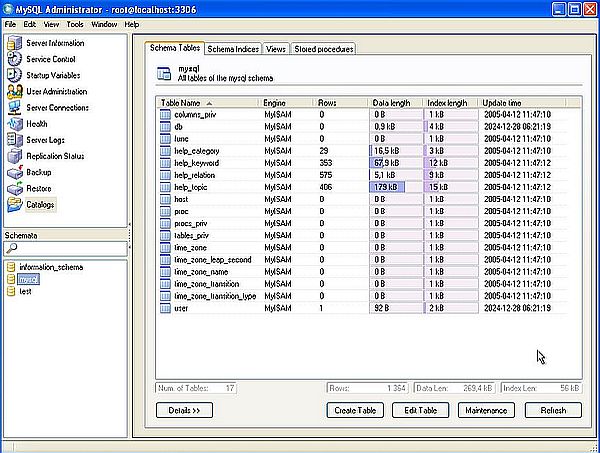
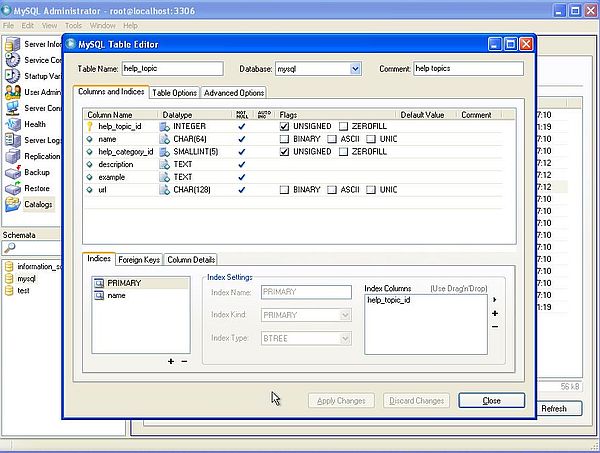
To manage the databases choose Catalogs in the upper part of the left pane, then choose a database from the Schemata list. The screenshot on the left shows the tables of the database "mysql". Double-clicking a table-entry will open it in order to being edited. On the screenshot on the right you can see the column structure and indices of the table "help_topic".
|
|
In the upper part of the left pane, you find an item called User Administration. The screenshots show how to do to create a new user called "allu", and just give him the SELECT privilege on the database "mysql". That means that "allu" may connect to "mysql" (but not the other databases) and may view the data in the tables of this database (but not add, delete, or modify any data in these tables). If you intend to use the (actually empty) database "test", you should give your user at least SELECT, INSERT, UPDATE, DELETE and EXECUTE privileges on that database.
![MySQL on Windows XP: MySQL Administrator - User creation [1] MySQL on Windows XP: MySQL Administrator - User creation [1]](../screenshots/winxp_mysql13a.jpg)
|
![MySQL on Windows XP: MySQL Administrator - User creation [2] MySQL on Windows XP: MySQL Administrator - User creation [2]](../screenshots/winxp_mysql13b.jpg)
|
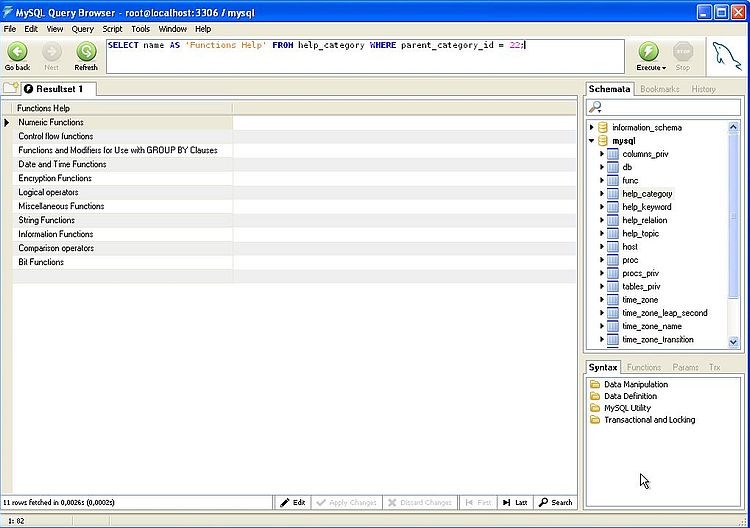
MySQL Query Browser is used to manage the data stored in MySQL databases: fill the tables, add and modify records, running SELECT queries. The MySQL Query Browser login screen is similar to the one of MySQL Administrator. If you log in as "allu", all you can do is viewing the records of the "mysql" database.
The screenshot shows how I ran a SELECT query to display the functions related items in the "help_category" table.
|
Note: If you use MySQL 5.7 or MySQL 8, you are probably familiar with MySQL Workbench. This application is also included with MySQL 5.0, but you should be careful using it: the included version is only alpha stage.
Using MySQL with PHP.
In my tutorial Installing PHP on Windows XP and using it with IIS, I describe how to configure Internet Information Services to run PHP 5 scripts. For the following, it is supposed that you have IIS running and PHP scripts are correctly executed.
There are just 2 steps to access a MySQL database with PHP:
- Copy the file libmysql.dll from your PHP installation folder (default: C:\php) to C:\WINDOWS\system32 (if this file already exists, rename it to libmysql.bak to be able to go back if something doesn't work correctly anymore).
- Enable the MySQL extensions in php.ini
During the configuration of IIS for PHP, I had created php.ini in the C:\WINDOWS directory. Open this file in your text editor, and make the following changes:
- Specify the correct path to the PHP extensions directory (here the default PHP installation path):
extension_dir="c:\php\ext" - Enable the MySQL extensions by uncommenting the following two lines:
extension=php_mysql.dll
extension=php_mysqli.dll
Note: I don't know if this is required, but I also enabled the extensions gd2 and mbstring. The reason is because on my Windows 10 (Apache, PHP 7) I got errors when running certain scripts without these extensions enabled.
Here is the code of a simple PHP script to test the connection to MySQL:
<html>
<head>
<title>PHP-MySQL test</title>
</head>
<body><p>
<?php
$host= '127.0.0.1'; $database='mysql'; $user = 'allu'; $passwd = 'password';
$mysqli = new mysqli($host, $user, $passwd, $database);
$sql = "SELECT count(*) AS _count FROM help_category";
$uresult = $mysqli->query($sql, MYSQLI_USE_RESULT);
$count = 0;
if ($uresult) {
$row = $uresult->fetch_assoc(); $count = $row['_count'];
}
echo "Number of help categories in database 'mysql' = $count";
?>
</p></body>
</html>
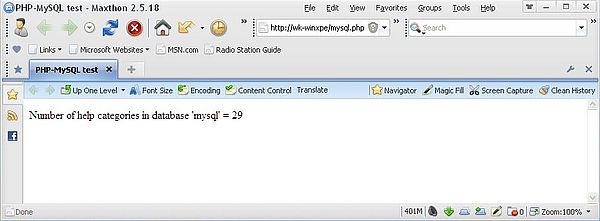
I named my script mysql.php and put it into the documents directory of the IIS web server. Then I launched Maxthon (my Windows XP web browser) and entered the following URL in the browser address field: http://wk-winxpe/mysql.php. The screenshot shows the script output.
|
Note: "wk-winxpe" is the name of my Windows XP computer. You would probably use the URL localhost/mysql.php.
Using MySQL with Perl and Python.
With Perl installed as described in my tutorial Installing Perl on Windows XP and using it with IIS, I did not succeed to connect to MySQL; error message: Can't locate DBD/mysql.pm. I suppose that this module is not included with the ActivePerl version that I installed.
With Python installed as described in my tutorial Installing Python 3 on Windows XP, I did not succeed to connect to MySQL; error message: No module named pymysql. I think that this module is not included by default with Python 3.
Using MySQL with Lazarus/Free Pascal.
The screenshot below shows a simple Lazarus application, that connects to the database "mysql" and displays the number of records in the table "help_category". The three database-related components are: TSQLQuery, TSQLTransaction, and TMySQL50Connection, where the "50" is specific for our MySQL 5.0 version. If you need help with implementing a Lazarus application using the TMySQLxyConnection, my tutorial Connecting to a MySQL database using Lazarus/Free Pascal might be what you are looking for. The tutorial is about MySQL 5.7 on Windows 10, but most of what is said there applies as such here. The major difference is that we have to use a TMySQL50Connection instead of the TMySQL57Connection.
![MySQL on Windows XP: Testing MySQL access with Lazarus/Free Pascal [1] MySQL on Windows XP: Testing MySQL access with Lazarus/Free Pascal [1]](../screenshots/winxp_mysql16.jpg)
|
Here is the code of the 3 methods executed when the buttons "Connect", "Query", resp. "Exit" are pushed.
procedure TfMySQL1.btConnectClick(Sender: TObject);
begin
if dbMySQLConnection.Connected then
dbMySQLConnection.Close;
// Set the connection parameters
dbMySQLConnection.HostName := 'localhost';
dbMySQLConnection.UserName := 'allu';
dbMySQLConnection.Password := 'password';
dbMySQLConnection.DatabaseName := 'mysql';
// Connect to the mysql database
try
dbMySQLConnection.Open;
edMess.Text := 'Connection to MySQL database "mysql" = OK!';
except
on E: ESQLDatabaseError do
edMess.Text := 'Connection to MySQL database "mysql" FAILED!';
end;
end;
procedure TfMySQL1.btQueryClick(Sender: TObject);
var
Count: Integer;
begin
if dbMySQLConnection.Connected then begin
// Query the database
dbSQLQuery.SQL.Text := 'SELECT count(*) FROM help_category';
try
dbSQLQuery.Open;
if dbSQLQuery.EOF then
Count := 0
else
Count := dbSQLQuery.Fields[0].AsInteger;
dbSQLQuery.Close;
// Display the query result
edCities.Text := IntToStr(Count);
except
on E: ESQLDatabaseError do
edMess.Text := E.Message;
end;
end;
end;
procedure TfMySQL1.btExitClick(Sender: TObject);
begin
if dbMySQLConnection.Connected then
dbMySQLConnection.Close;
Close;
end;
The screenshot shows the running application.
![MySQL on Windows XP: Testing MySQL access with Lazarus/Free Pascal [2] MySQL on Windows XP: Testing MySQL access with Lazarus/Free Pascal [2]](../screenshots/winxp_mysql17.jpg)
|
If you like this page, please, support me and this website by signing my guestbook.