Installing and running Microsoft C Compiler on Windows 1.04.
Several of Microsoft software development programs for DOS may be run without problems on Windows 1. This tutorial is about the installation of the Microsoft C Compiler 4.0 on Windows 1.04 [IBM PS/2]. You can download the software form the Microsoft C/C++ 4.0 page on the WinWorld website. The download archive contains eight 5.25" 360kB floppy diskette images. Note, that the Microsoft C Compiler 4.0 manuals are also available at that site.
The software comes without an installer program; this means that the files have to be manually copied to the correct directories. The Microsoft C compiler 4.0 User Guide describes how do proceed for the first 3 diskettes (containing all that you need to create small model programs). I installed the software using a custom batch file, that copies the content of all 8 diskettes to the hard disk. Here is the code of my mscsetup.bat (you can download it from my website, together with the other files used in this tutorial).
@ECHO OFF
C:
CD \
MD MSC
CD MSC
MD BIN
MD LIB
MD INCLUDE
MD INCLUDE\SYS
ECHO Please insert Disk01 (C Compiler)
PAUSE
COPY A:\*.* C:\MSC\BIN
ECHO Please insert Disk02 (Utilities)
PAUSE
COPY A:\*.EXE C:\MSC\BIN
ECHO Please insert Disk03 (Libraries - Small model)
PAUSE
COPY A:\LINK.EXE C:\MSC\BIN
COPY A:\*.H C:\MSC\INCLUDE
COPY A:\SYS\*.H C:\MSC\INCLUDE\SYS
COPY A:\*.LIB C:\MSC\LIB
COPY A:\*.OBJ C:\MSC\LIB
MD DEVEL
COPY A:\DEMO.C C:\MSC\DEVEL
ECHO Please insert Disk04 (Libraries - Medium and Compact Model)
PAUSE
COPY A:\*.LIB C:\MSC\LIB
COPY A:\*.OBJ C:\MSC\LIB
ECHO Please insert Disk05 (Libraries - Large Model)
PAUSE
COPY A:\C3L.EXE C:\MSC\BIN
COPY A:\*.LIB C:\MSC\LIB
COPY A:\*.OBJ C:\MSC\LIB
ECHO Please insert Disk06 (Startup Source Code)
PAUSE
MD STARTUP
XCOPY A:\*.* C:\MSC\STARTUP /S
ECHO Please insert Disk07 (Learning CodeView)
PAUSE
MD CODEVIEW
XCOPY A:\*.* C:\MSC\CODEVIEW /S
ECHO Please insert Disk08 (SDK Update)
PAUSE
MD UPDATE
XCOPY A:\*.* C:\MSC\UPDATE /S
Some notes concerning this script:
- You should quit Windows and perform the installation from DOS. Start the setup script from a directory that is in your PATH (C:\WINDOWS, or C:\DOS).
- The software is installed to C:\MSC.
- The software installs all 8 diskettes; be sure to insert the correct diskette when asked to switch.
- Diskettes 1 to 3 are essentially copied as described in the Microsoft C Compiler 4.0 User Guide, the .OBJ files being copied to the LIB subdirectory. During the copy of Disk03 the directory DEVEL (for your C sources and the files created by building them) is created, and DEMO.C is copied to there.
- The medium, compact and large model files (Disk04 and Disk05) are copied to the LIB directory (C3L.EXE is copied to BIN).
- The Startup Source Code (Disk06) is copied to a directory called STARTUP.
- The CodeView tutorial (Disk07) is copied to a directory called CODEVIEW.
- The SDK updates (Disk08) are copied to a directory called UPDATE.
- You may choose an installation directory other than C:\MSC, but in this case you'll have to change all directory references in the script. The name of the subdirectories BIN, INCLUDE and LIB should not be changed. Concerning the directory for the C sources and programs, you may choose the name that you want; you may create it at a different location on your harddisk, too. This is also true for the directories that will contain the content of Disk06, Disk07, and Disk08. You may remove the code to copy these files, if you don't want them on the harddisk.
- The script does not change the system files AUTOEXEC.BAT and CONFIG.SYS. This means that the environment variables needed by the C compiler/linker have to be set elsewhere (cf. further down in the text).
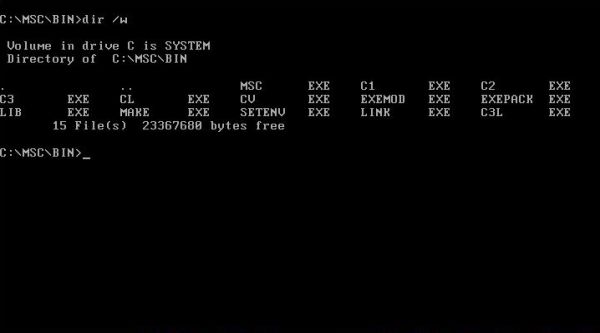
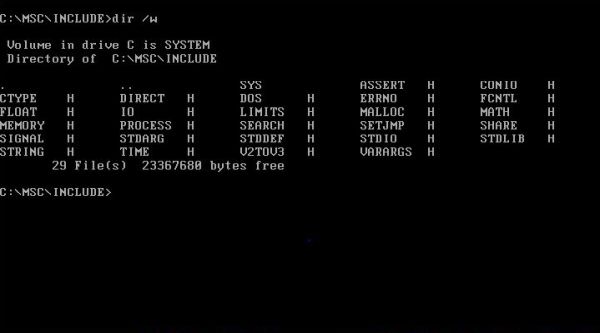
The screenshots show the first part (screenshot on the left) and the final part (screenshot on the right) of the installation process.
![Installing and running Microsoft C Compiler on Windows 1.04: Custom installation script [1] Installing and running Microsoft C Compiler on Windows 1.04: Custom installation script [1]](../screenshots/win1_msc1a.jpg)
|
![Installing and running Microsoft C Compiler on Windows 1.04: Custom installation script [2] Installing and running Microsoft C Compiler on Windows 1.04: Custom installation script [2]](../screenshots/win1_msc1b.jpg)
|
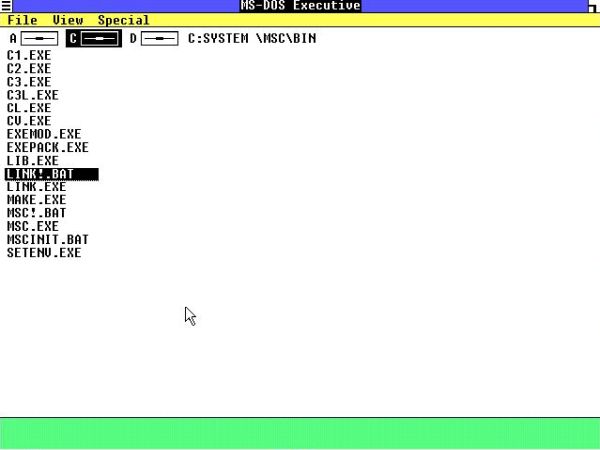
The screenshot on the left shows the content of the BIN subdirectory. You can in particular see MSC.EXE (the compiler) and LINK.EXE (the linker); concerning the other executables, cf. the software documentation. The screenshot on the right shows the content of the INCLUDE subdirectory. You can see files that you know from C on other platforms: STDIO.H, STRING.H, MATH.H, ...
|
|
As I said above, the Microsoft C Compiler needs some environment variables to be set. First, the directory with the executables (BIN) has to be added to the PATH. Second, two new environment variables, called INCLUDE and LIB have to be set to the path of the corresponding subdirectories. You can do this in your AUTOEXEC.BAT file. I did it in the custom batch files described below.
Building programs also needs a temporary directory and an environment variable TMP pointing to it. When installing
the software, I already had the following lines in my AUTOEXEC.BAT:
SET TEMP=C:\TEMP
SET TMP=C:\TEMP
If C:\TEMP does not exist on your system, be sure to create it (command: MKDIR C:\TEMP).
Also, check your CONFIG.SYS. It should contain the following lines:
FILES=15
BUFFERS=10
If your CONFIG.SYS has higher values, then do not change them!
The installation files don't include an IDE. You can use Notepad to create the C source file, and (if you used my setup script without changing it) save the file to C:\MSC\DEVEL. Building the program requires 2 steps: compilation (using MSC.EXE) and linkage (using LINK.EXE). Both of these are DOS programs, but they may be run by double-click from File Manager. However, this requires two things: First, the environment variables mentioned above must be set; second, as your source file is in DEVEL and not in BIN (from where you start the program), you would have to indicate the path to the .C file (compilation), resp. the .OBJ file (linkage). To simplify the procedure, I created three batch files: mscinit.bat (that sets the environment variables), msc!.bat (that launches the compiler) and link!.bat (that launches the linker). These latter two, before running the executable, check if the environment variables are set, and if not, call mscinit.bat, and then set the current directory to C:\MSC\DEVEL, so no more need to indicate a path for the .C and .OBJ files. Here is the code of my batch files (the environment variable DEVEL is used to check if mscinit.bat has to be run or not). I stored the scripts into the C:\MSC\BIN directory.
REM * MSCINIT.BAT
@ECHO OFF
PATH C:\MSC\BIN;C:\WINDOWS;C:\DOS
SET INCLUDE=C:\MSC\INCLUDE
SET LIB=C:\MSC\LIB
SET DEVEL=msc
REM * MSC!.BAT
@ECHO OFF
IF NOT "%DEVEL%"=="msc" CALL MSCINIT.BAT
C:
CD \MSC\DEVEL
C:\MSC\BIN\MSC.EXE
REM * LINK!.BAT
@ECHO OFF
IF NOT "%DEVEL%"=="msc" CALL MSCINIT.BAT
C:
CD \MSC\DEVEL
C:\MSC\BIN\LINK.EXE
Note: This is the way that I normally proceed on DOS and after the init script has been called, the new environment variables are set and this script isn't called further more. On Windows, things seem to be different. When msc!.bat is terminated and control comes back to File Manager, the environment variables seem to be reset to their original state! This does not affect the correct working of my scripts. Just to say that the DEVEL variable is (probably) not useful on Windows, and the call to the init script would (probably) better be always done (i.e. be done without the IF NOT "%DEVEL%"=="msc" condition).
Time to try out the installation. You can build DEMO.C if you want, or create the following simple "Hello World" program and build it instead.
main() {
printf("%s\n", "HELLO WORLD!");
exit(0);
}
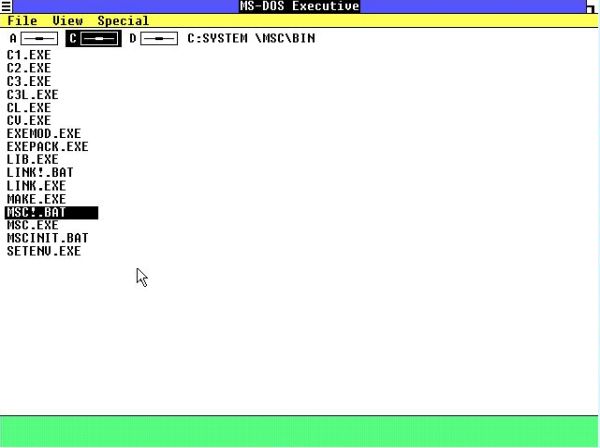
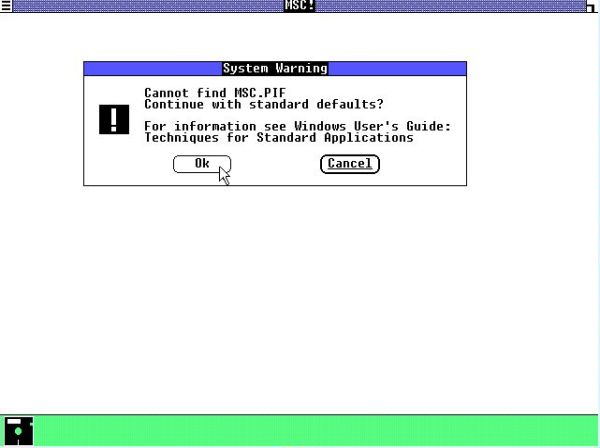
Save the program as HELLO.C in the C:\MSC\DEVEL directory. To compile the program, in File Manager navigate to the C:\MSC\BIN directory and double-click the file MSC!.BAT (screenshot on the left). A warning message pops up, telling you that MSC.PIF is not found, and asking if you want to continue with standard defaults. Push the Ok button to do so (screenshot on the right).
|
|
The compiler (as the linker) is interactive. It asks you for the source file name (extension .C presupposed). As the batch file has set the current directory to C:\MSC\DEVEL (directory that contains HELLO.C), you can enter "hello" (without path) as source file. For all other files, you can accept the defaults (just hit ENTER). If there are compilation errors, they will be displayed; if all is ok, there will be no compiler output. To return to File Manager, hit any key.

|
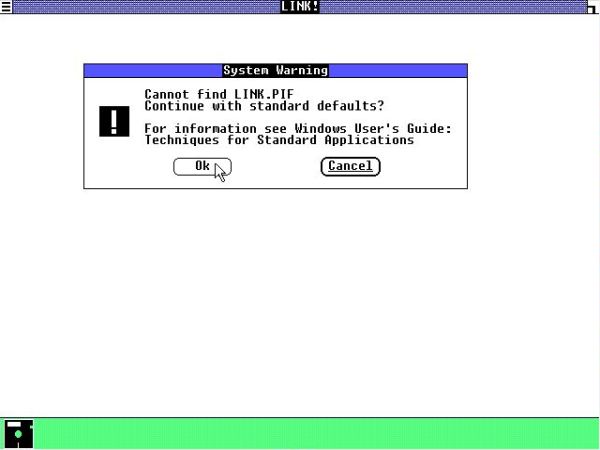
We can now link the object file created. In File Manager (C:\MSC\BIN), double-click the file LINK! (screenshot on the left). As with the compilation, we get a warning that LINK.PIF is not found. Push the Ok button to continue (screenshot on the right).
|
|
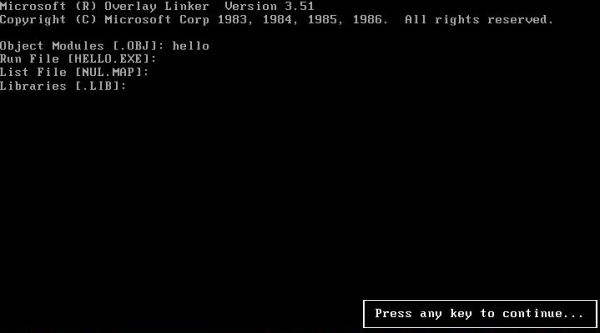
All we have to enter is the name of the object file, that is the same as the one of the source ("hello"; the extension .OBJ is presupposed). For all other files, you can accept the defaults (just hit ENTER). If there are linkage errors, they will be displayed; if all is ok, there will be no linker output. To return to File Manager, hit any key.
|
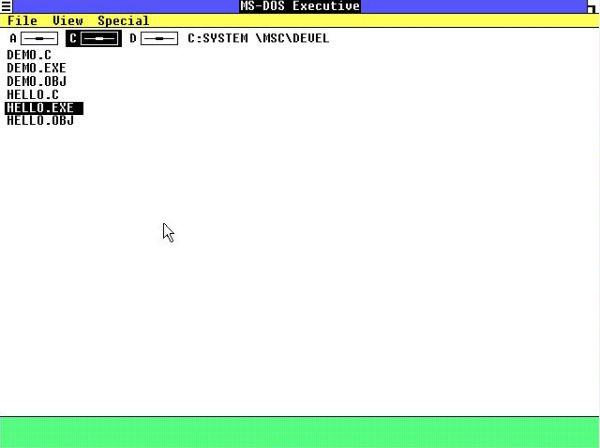
Now, navigate to C:\MSC\DEVEL. Besides HELLO.C, you can see the newly created HELLO.OBJ and HELLO.EXE.
|
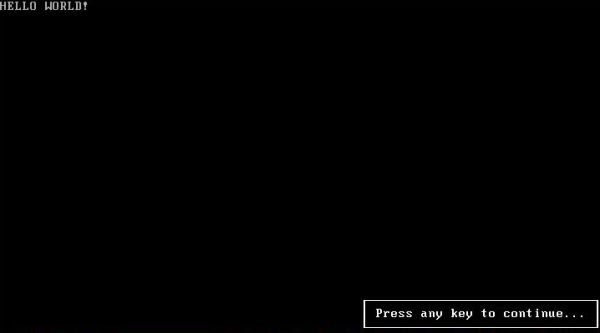
You can run the executable HELLO.EXE by double-clicking it in File Manager. As for the compiler and the linker, you'll get a warning concerning the non-existing PIF file. The screenshot shows the execution of the program. Hit any key to return to File Manager.
|
Note: Windows 1 includes a PIF file editor (PIFEDIT.EXE), that you could use to create PIF files for MSC.EXE, LINK.EXE and the executables that you create with the Microsoft C Compiler. However, the default values, proposed by this tool, are not always adequate. In the case of LINK.EXE, for example, using a PIF file with these values, results in a program abortion; error message: Insufficient stack space.
To terminate the tutorial, here is another sample program (based on an example of the Microsoft C 4.0 Run-Time library Reference, included within the documentation download from WinWorld). The program displays the items (strings) entered at the command line, sorted in ascending order. As the first argument received by the program is the program name, I added code that copies the last argument at the first element position (overwriting the program name), and then called the sort() function with an array size of 1 less than the actual number of array elements. Here is the code of CMD_SORT.C (included within the download archive on my site):
#include <search.h>
#include <string.h>
#include <stdio.h>
int compare();
int i;
main(argc, argv)
int argc;
char **argv;
{
/* The following statement sorts the command line
arguments in lexical order
*/
if (argc > 1) {
argv[0] = argv[argc - 1];
qsort((char*) argv, argc - 1, sizeof(char*), compare);
for (i = 0; i < argc - 1; ++i)
printf("%s\n", argv[i]);
}
}
int compare(arg1, arg2)
char **arg1, **arg2;
{
return(strcmp(*arg1, *arg2));
}
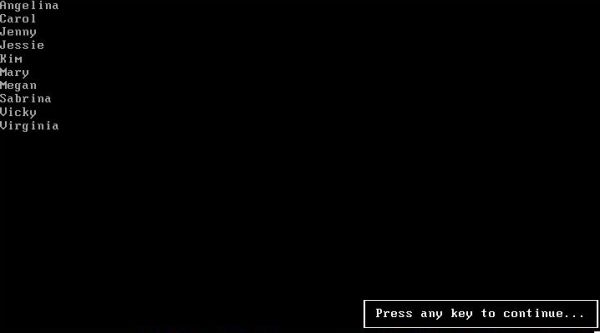
As the program takes command line arguments, you cannot run it by double-clicking it in File Manager. Instead, just select it, then choose File > Run from the menu bar and add the items to be sorted after the program name (filled in automatically, if selected).
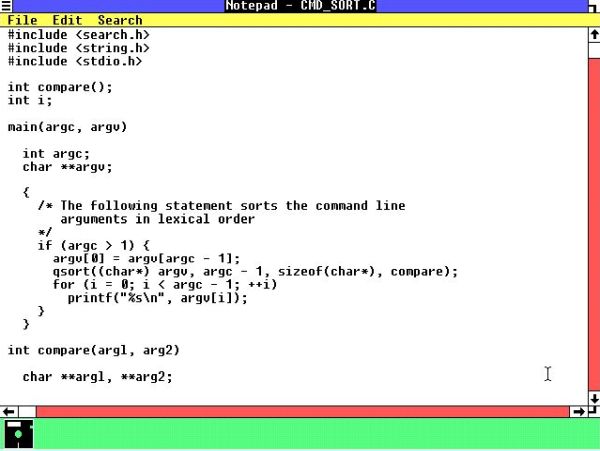
The screenshot on the left shows the C source opened in Notepad. The screenshot on the right shows a sample execution of the EXE file created.
|
|
If you like this page, please, support me and this website by signing my guestbook.