Exotic programming languages for DOS: XPL0.
"XPL0 is essentially a cross between Pascal and C. It looks somewhat like Pascal but works more like C. It was originally created in 1976 by Peter J. R. Boyle, who designed it to run on a 6502 microprocessor as an alternative to BASIC. Although XPL0 stands for eXperimental Programming Language level Zero, it's well beyond the experimental stage and, hopefully, is regarded as well beyond level zero. The name is kept for historical reasons. The language is based on PL/0, Niklaus Wirth's example compiler in his book 'Algorithms + Data Structures = Programs'. Over the years, versions of XPL0 have been ported to many different computers. The programs provided on this site are mostly for IBM-compatible PCs. They all run under DOS, and DOSBox for modern Windows computers."
The paragraph above is how they describe XPL0 on xpl0.org. This tutorial is about the installation of XPL0 3.1 on MS-DOS 6.22. It should also apply to other DOS distributions. Concerning FreeDOS, it might be that you'll have to use the HIMEMX.EXE memory manager (instead of standard JEMMEX.EXE) to make MASM (cf. below) running.
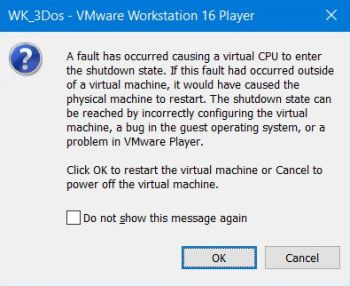
The actual release of XPL0 is version 3.5, with a 32-bit optimizing protected-mode version of the compiler. This release is considered to be lots more powerful than the previous (16-bit) versions. Unfortunately, I did not succeed to use this version on my MS-DOS 6.22 VMware virtual machine. The reason is that the only assembler that version 3.5 supports is TASM, and the TASM linker does not work on VMware. Running it results in the VMware error message A fault has occurred causing a virtual CPU to enter the shutdown state and the VM is rebooted.
|
This might be a VMware problem, but it is also possible that the problem is due to TLINK. Just think of the Crt unit of Turbo Pascal, calling one of its functions or procedures resulting in a "divide by zero" error due to not correctly dealing with the modern (high-speed) CPUs. Anyway, I did not try to solve the problem, but decided to install the old XPL0 3.1 version, that beside TASM also supports MASM as assembler. And this works quite well on my MS-DOS 6.22.
Why do we need an assembler, you may ask. The reason is that the build of XPL0 executables requires 3 steps:
- The XPL0 compiler converts the XPL0 source code (filename extension .xpl) into assembly code (filename extension .asm).
- The assembler (MASM.EXE) converts the assembly code into object code (filename extension .obj).
- The linker (LINK.EXE, included with MASM) links the object code to an executable (filename extension .exe).
Installing MASM 5.1.
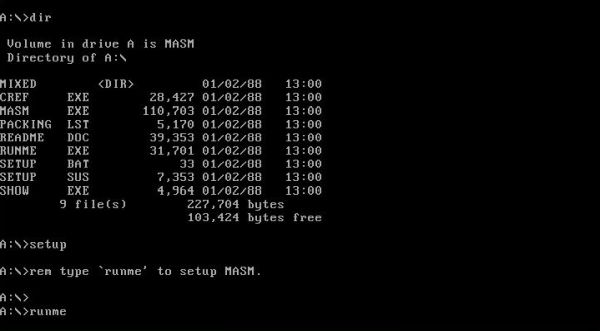
It's MASM 5.1 that is mentioned on xpl0.org, so I decided to use this version; not to exclude that MASM 6.11 would work correctly with XPL0, too. You can download the software from the Microsoft Macro Assembler 5.x page on the WinWorld website. The download archive contains 5 5.25" 360kB floppy images. Insert Disk01 (MASM) and run RUNME.EXE.
|
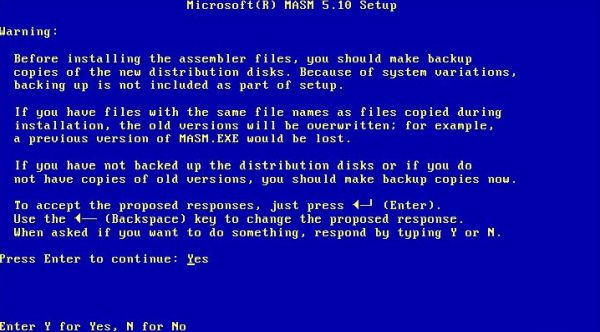
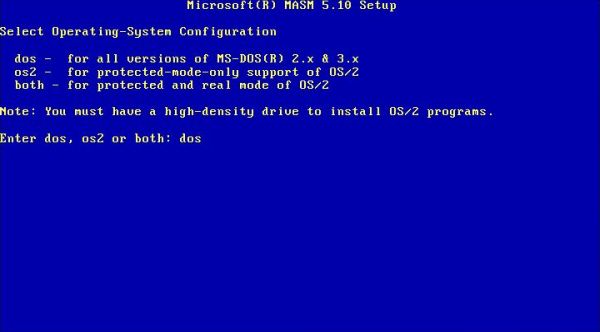
The setup program will ask you some questions concerning what to install and where to install it. The screenshot on the left shows some general information, the screenshot on the right shows the selection of the operating system; "dos" is well preselected, so just hit ENTER.
|
|
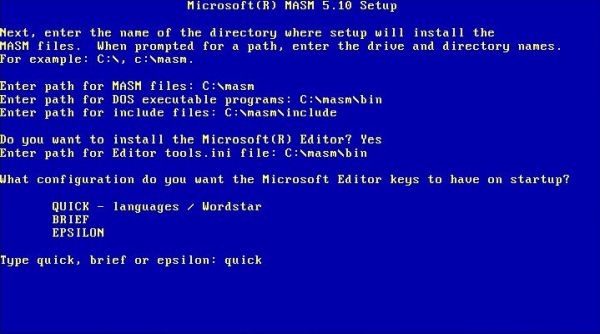
On the following screens, you are asked for the installation directories. The default directory for the MASM files is c:\masm. I changed the defaults for the executables and include files (c:\bin and c:\include) to c:\masm\bin and c:\masm\include respectively. Please, note that if you use other directories, you'll have to adapt the batch files, described further down in the text accordingly. You may or may not install the Microsoft Editor. This program, called M.EXE, is a full screen editor without menu (also without assembly syntax highlighting), all commands being run using shortcut keys. M is not really easy to work with, if you aren't used to it. The screenshot shows my MASM configuration selections.
|
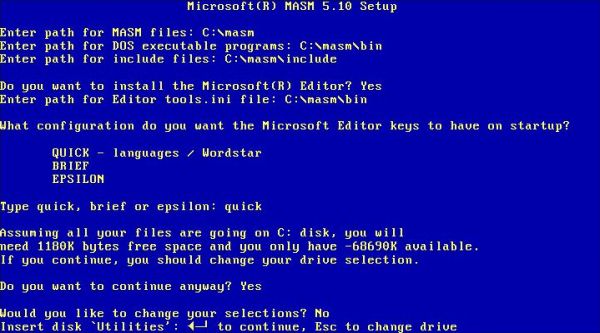
MASM 5.1 is really old software, so no real surprise that the setup program was not able to correctly determine the size of my 2 GB harddisk. Fortunately, it gives the opportunity to ignore that "there is not enough space" to install the software. Setup continues with copying the files. Switch the diskettes when asked to do so. The diskette images included in the WinWorld archive are numbered from 01 to 05; just insert them in that order ("Utilities", the first diskette asked for, corresponding to Disk02).
|
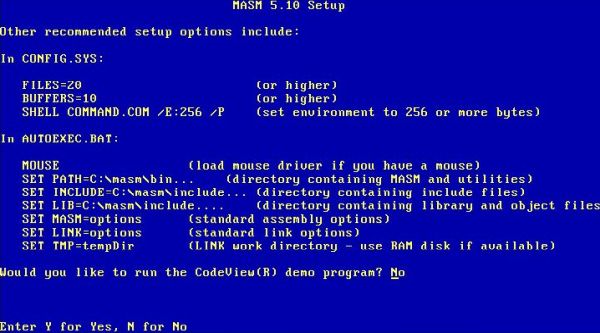
Finally, the setup program displays the changes that you should make to your CONFIG.SYS and AUTOEXEC. BAT files. Concerning CONFIG.SYS, you'll probably have nothing to change, because the actual settings values are higher than the minima needed by MASM (in my case: BUFFERS=15; FILES=30; /E:800). Concerning AUTOEXEC.BAT, leave it as it is. We will create a batch files that will set the environment variables for MASM.
|
Testing the MASM installation.
First, I created the new directory c:\devel\masm for my MASM source files (the executables created by the assembler
will be placed there, too):
mkdir c:\devel
mkdir c:\devel\masm
Then, I created a custom batch file, called MASMINIT.BAT, that I placed in the directory C:\DOS (directory that is in the executables path). Here
is its content (if you used the default or your own install directories, you'll have to adapt the directories!):
@echo off
set path=%path%;c:\masm\bin
set include=c:\masm\include
set lib=c:\masm\include
set tmp=c:\temp
cd \devel\masm
First, the script adds the directory with the MASM executables to the path, then sets the MASM specific environment variables (make sure that C:\TEMP exists; if not, create it), and finally sets the current directory to the directory where I store my source files.
The MASM installation files include a program that may be used to display the content of a text file. The assembly source is called SHOWR.ASM. It is located in the
MASM install directory, together with PAGERR.ASM, containing some subroutines called by SHOWR.ASM. I copied these two files to my source files directory:
cd \masm
copy showr.asm c:\devel\masm
copy pagerr.asm c:\devel\masm
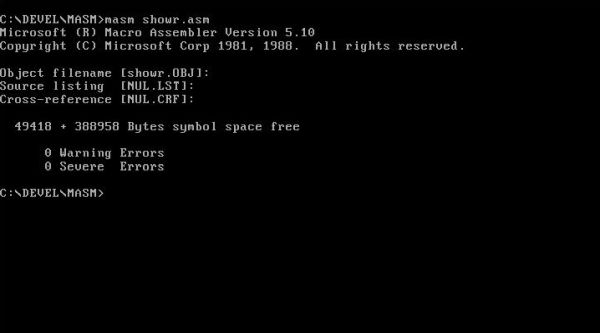
Now, we can use MASM.EXE to assemble the two assembly sources. The screenshot below the assembler commands shows the successful assembling of
SHOWR.ASM
masminit
masm showr.asm
masm pagerr.asm
|
MASMINIT.BAT initializes the MASM environment (you need to run it only once...). As the script is located in a directory being part of the executables path, we can launch it from any directory. And as it sets the current directory to c:\devel\masm, where the sources are located, we don't need to specify a path with the assembly file names. The two commands above will create two object files, called SHOWR.OBJ and PAGERR.OBJ (in c:\devel\masm).
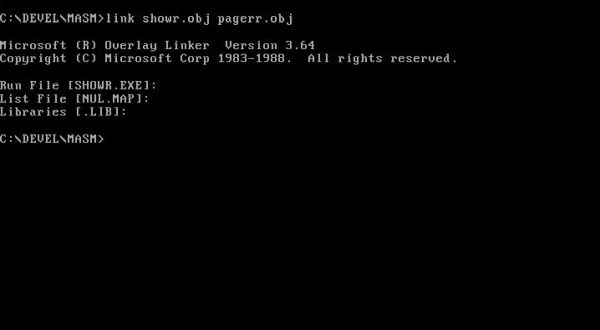
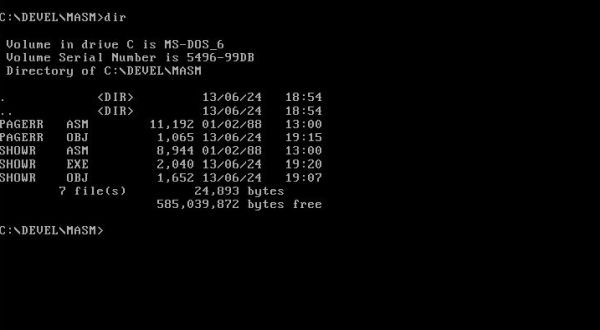
To create the executable, we have to link the two object files using the MASM linker LINK.EXE. The screenshots below the linker command show
the successful linkage (on the left), and the content of c:\devel\masm, with the executable created SHOWR.EXE.
link showr.obj pagerr.obj
|
|
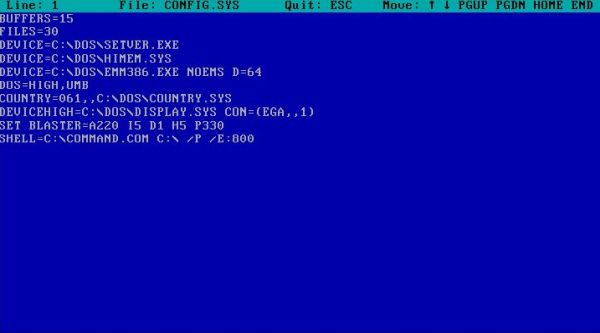
You can run SHOWR.EXE without parameter; in this case the program asks for a filename. Or, you can specify the text file to display as command line argument. The screenshot shows the display of my CONFIG.SYS.
|
Installing XPL0 3.1.
Now we are ready to install XPL0. You can download it from The XPL0 Programming Language website. Be sure to choose
the old 16-bit release (XPL0 version 3.1)! The download archive contains the application file system. I unpacked the ZIP file on my Windows 10, and copied the extracted
files to a virtual floppy diskette. On the MS-DOS machine, I created the directory c:\cxpl (you should use this name, because most XPL0 examples,
that you find on the Internet, use this path in their INCLUDE directives), and copied the content of my diskette to there.
mkdir c:\cxpl
cd cxpl
a:
copy *.* c:
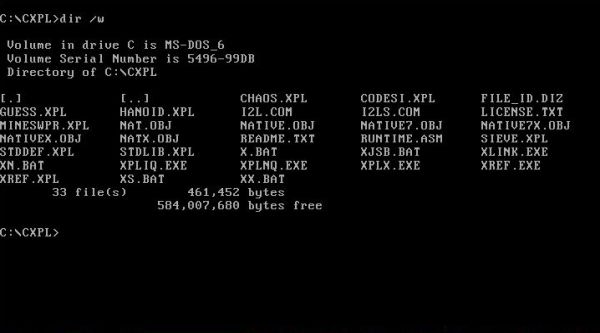
The screenshot below shows the content of the XPL0 installation directory.
|
Testing the XPL0 installation.
As I said above, the build of an XPL0 source requires 3 steps: compilation, with production of an assembly file; assembly of this file, with creation of an object file;
linkage of this object file, with creation of the executable. The XPL0 3.1 installation files include some batch files, that allow to do all
3 steps with one command. Please, note that before you can run these batch file, you'll have to add the directory with the MASM executables to the path:
set path=c:\dos;c:\masm\bin
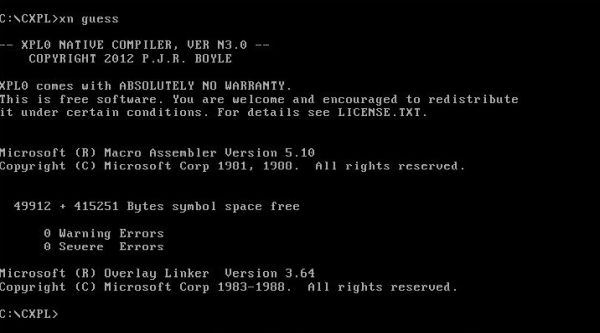
Concerning the batch files, lets first view XN.BAT. This script calls the standard compiler XPLNQ.EXE for compilation, MASM.EXE for assembly, and LINK.EXE for linkage. Note that, when running the batch files, you'll have to specify the source file name without file extension! The screenshot below shows the build of GUESS.XPL, a simple game program, included with the installation files.
|
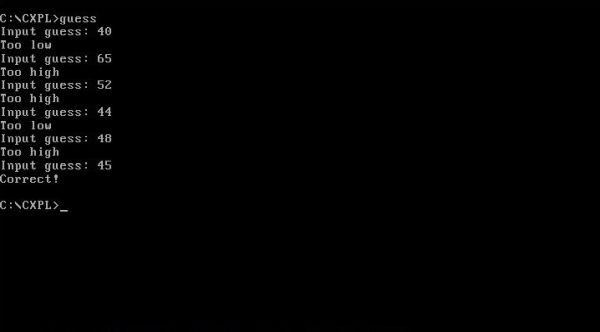
The result of the build is an executable of 17,814 bytes. The screenshot shows it running on my MS-DOS 6.22 virtual machine.
|
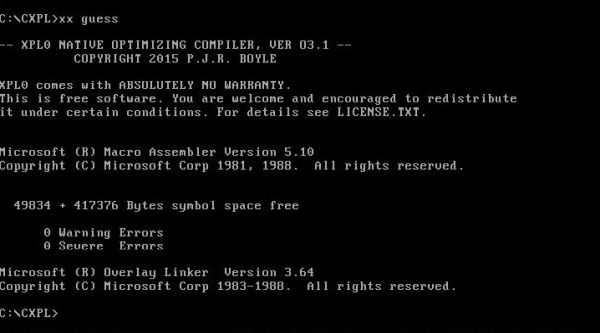
Another batch file included is XX.BAT. It calls the optimizing compiler XPLX.EXE for compilation, MASM.EXE for assembly, and LINK.EXE for linkage. Using this compiler should produce executables that are significantly faster than those created with XPLNQ. The screenshot shows the build of GUESS.XPL.
|
It seems that the executable created with the optimizing compiler is not only faster, but also less in size. In the case of my builds of GUESS.EXE: 14,247 vs 17,814 with the standard compiler.
For programs that do many floating-point calculations running on a computer that has an 80387 math coprocessor (or have a 486DX or Pentium
or better CPU), we can make them run much faster by linking in NATIVE7 instead of NATIVE resp. NATIVEX. As there is no reason to not always
use this feature, we can make a permanent change in XX.BAT, or, as I did, create a copy of XX.BAT (I called it XPL0.BAT), where we change the linker options.
Here is the code of my XPL0.BAT, the changes made in the original XX.BAT being displayed in bold (I commented out the deletion of the assembly file, as it may be
interesting to keep the assembly sources created).
@echo off
xplx %1
if errorlevel 1 goto exit
masm %1;
link /e/f/packcode/se:512 %1+c:\cxpl\native7;
rem del %1.asm
del %1.obj
:exit
Using NATIVE7 seems further reduce the executable size. In the case of my build of GUESS.EXE, the final executable had a size of 10,720 bytes.
Customizing the XPL0 installation.
First, lets create the directory c:\devel\xpl0 for the XPL0 sources:
mkdir c:\devel\xpl0
In this directory, lets create a simple "Hello world" program, called HELLO.XPL. Here is the code:
code Text=12;
Text(0, "Hello World from XPL0!")
Then, similarly as we did for MASM, lets create a batch file called XPL0INIT.BAT to initialize the XPL0 development environment. Place this
file into c:\dos. Located in a directory being part of the executables path, we can launch the script from any directory. Here is the content of my batch file:
@echo off
set path=%path%;c:\cxpl;c:\masm\bin
set include=c:\masm\include;c:\cxpl
set lib=c:\masm\include
set tmp=c:\temp
cd \devel\xpl0
First, we add the directories with the XPL0 and the MASM executables to the path. Then, we set the environment variables for MASM. Important here, that the directory c:\cxpl must be added to the list of include directories. Otherwise, MASM will only search c:\masm\include and will not find the XPL0 runtime; error message: error A2116: Include file not found RUNTIME.ASM. Finally, we set the directory with the XPL0 sources as current directory.
Now, we can build HELLO.XPL by running the commands:
xpl0init
xpl0 hello
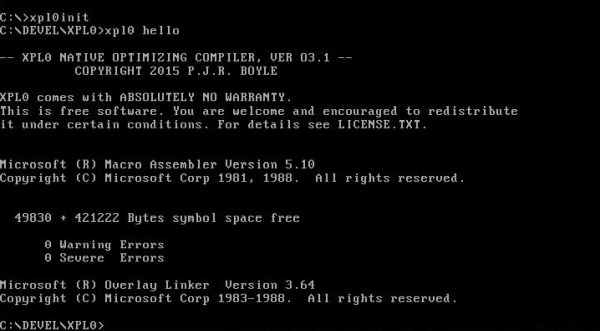
To note, that xpl0init needs to be run only once. The screenshot shows the successful build.
|
XPL0 program samples.
As XPL0 is a barely known programming language, it's rather difficult to find XPL0 documentation and program samples. At the xpl0.org website, you find links to the manual for version 3.1 in PDF format (direct download link: www.xpl0.org/manual.pdf, as well as to a series of simple XPL0 program samples. The site also contains the description and download link (ZIP archive with executable, source, and everything else you need) of a whole bunch of games written in XPL0. Another place, where you can find XPL0 code is the Rosetta Code website. Note that in all examples from this site, you'll have to alter the include of the intrinsics codes to inc c:\cxpl\codesi; ("codes" in the Rosetta Code files).
So, lucky you, you have a programming language, that none of your friends, colleagues, and neighbors has an idea that it exists, running on your DOS machine! Unfortunately, lots of things seem not to work, at least not on my MS-DOS 6.22 VMware virtual machine. For most of the downloaded program samples, that I tried out, either I got some compilation error, or, the build succeeded, but the executable did not start up, making hang the DOS operating system (push CTRL+ALT+DEL to reboot the VM). Why this is so, no idea. Concerning writing my own programs in XPL0, I didn't try ... to many other things to do!
Here is the code of CLOCK.XPL, one of the samples from the xpl0.org/guess.html page. It's interesting, because it shows how to access the DOS API,
using interrupt 21.
inc c:\cxpl\codesi;
proc NumOut(N); \output a 2-digit number, including leading zero
int N;
begin
if N <= 9 then ChOut(0, ^0);
IntOut(0, N);
end; \NumOut
proc ShowTime; \display current time (e.g: 12:03:45)
int Reg;
begin
Reg:= GetReg; \get address of array with copy of CPU registers
Reg(0):= $2C00; \call DOS function 2C (hex)
SoftInt($21); \DOS calls are interrupt 21 (hex)
NumOut(Reg(2) >> 8); \the high byte of register CX contains the hours
ChOut(0, ^:);
NumOut(Reg(2) & $00FF); \the low byte of CX contains the minutes
ChOut(0, ^:);
NumOut(Reg(3) >> 8); \the high byte of DX contains the seconds
end; \ShowTime
begin \Main
repeat ChOut(0, $0D); \carriage return moves to the start of the line
ShowTime; \call routine to show the current time
until ChkKey; \keep repeating until a key is struck
end; \Main
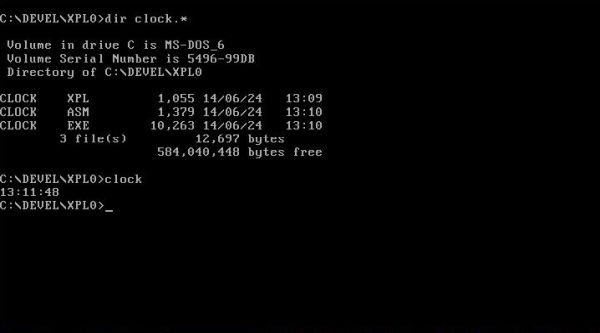
And here is the output of the program (the time shown advancing in real time, of course).
|
Another sample from that webpage, that built and executed correctly on my system, is MANDEL.XPL. Here is the screenshot of the program output.

|
If you find this text helpful, please, support me and this website by signing my guestbook.