Installing Visual FoxPro on Windows XP.
"Visual FoxPro, by Microsoft, is a data-centric and procedural programming language with object-oriented programming (OOP) features. FoxPro 2.6 worked on DOS, Windows, MacOS, and Unix. Visual FoxPro 3.0, the first "Visual" version, reduced platform support to only Windows and Mac; later versions were Windows-only. Version 9.0, released in December 2004 and updated in October 2007 with the SP2 patch, was the final version of the product."
The paragraph above is how Visual FoxPro is described in the corresponding article of Wikipedia, where you find lots of details, including code examples.
This tutorial is about installing Visual FoxPro 9 on Windows XP (32-bit). Installation on more recent operating systems should be possible. There are several websites, where they describe how to install the software on Windows 10/11. No idea, if this really works (?).
You can download Visual FoxPro 9 from the Internet Archive. The download is a RAR archive. If you do not succeed to open it, download the free and "best ever" unpacker application 7-Zip. The archive contains 4 folders: the first one contains the setup files for VFP 9, the second one the VFP 9 SP1, the other two are Spanish language related.
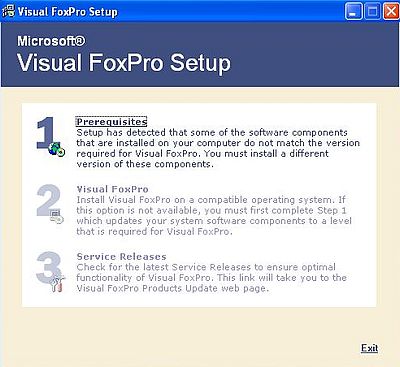
I unpacked the first two folders on my Windows 10 and burned them onto a CDROM, aka created a CD ISO. To install VFP 9, run setup.exe. The screenshot shows the installation menu. Be sure to run Prerequisites before installing VFP.
|
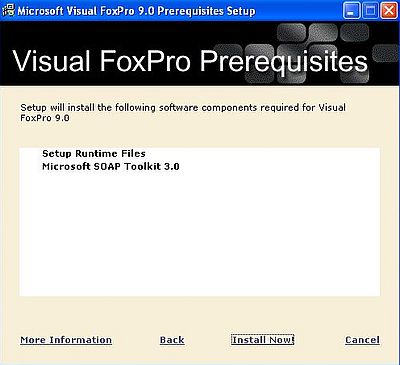
After you have accepted the license agreement, the installer displays the prerequisites that have to be installed. Click the Install Now button to do so (the required software is included on the CD).
|
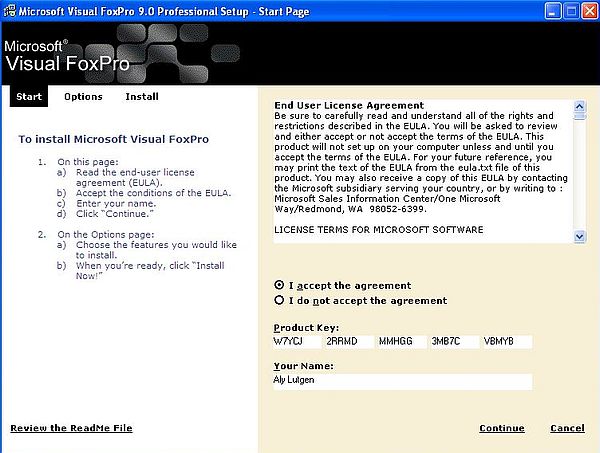
When finished, push the Done button. This leads you back to the menu, where now, you may select Visual FoxPro. In the first window, you are asked for a user name (normally filled in) and the VFP 9 serial number. You find the serial on the VFP CD.
|
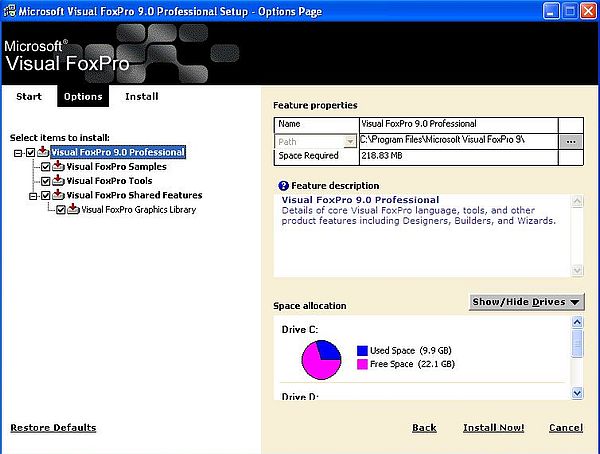
The next window concerns the installation options: the installation path and the components to be installed. You can let all preselected defaults here.
|
Note: During the installation, I got a File not found error. If this happens, just push the Ignore button. The installation will continue and successfully finish.
Now, from the second folder on the installation CD, install the Service Pack 1.

|
Note: There is a Service Pack 2 (and I think also a further security update) available for Visual FoxPro 9. I haven't (yet) installed it...
Developing Visual FoxPro applications.
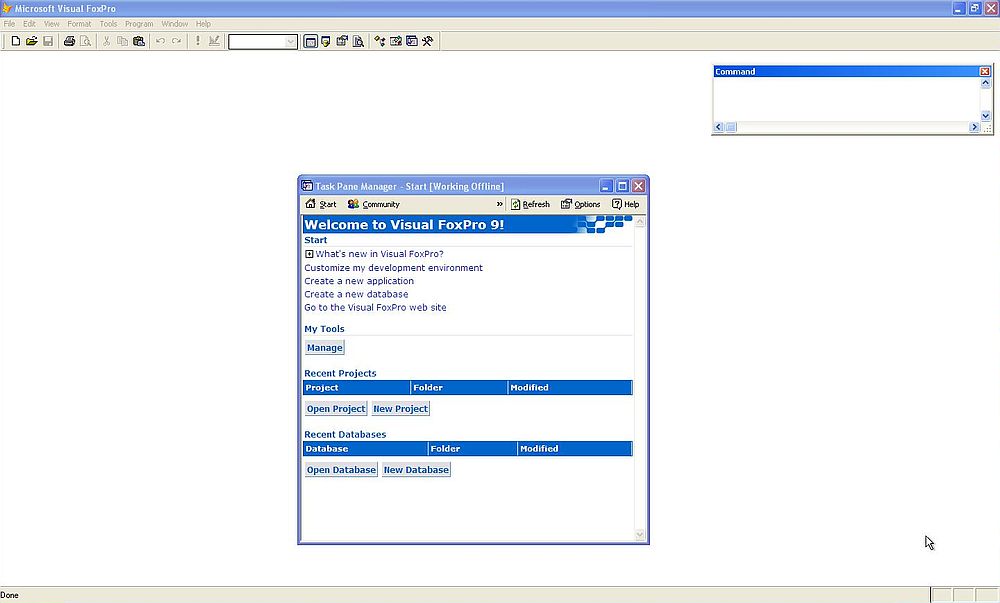
The VFP 9 GUI is made of a main window that includes further windows, that may be shown/hidden, or minimized. The Task Pane Manager, that is shown at application startup, shows several quick links, as for example creating a new project or database, or opening en existing project or database.
|
Like Visual dBASE, Visual FoxPro may be used to build complete desktop applications with menus to control the application, forms to enter data, reports to view data, and of course databases (one or more tables in DBF format) to store the data used by the application. Development in Visual FoxPro is partially done by placing visual components and defining their properties and behavior in a property sheet resp. an event sheet, partially by entering code using the VFP language.
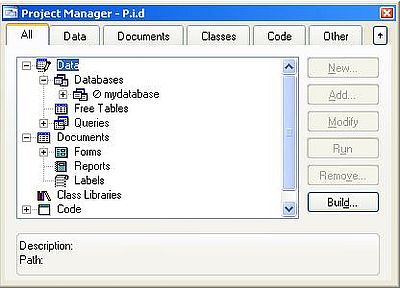
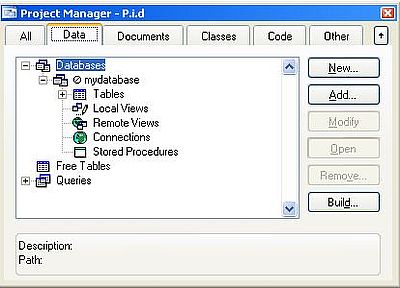
The screenshot on the left shows the typical components of a VFP project, including data (with databases, free tables and queries), documents (with forms, reports, and labels), and class libraries. The screenshot on the right shows details of the database component: tables, local and remote views, connections, and stored procedures.
|
|
You can find lots of information concerning Visual FoxPro on the Internet: tutorials, books, complete project sources downloads... A good starting point to learn to know the software are the Visual FoxPro walkthroughs at vfphelp.com. The Visual FoxPro 6.0 Programmer's Guide at flylib.com might also be helpful (even though not all, that you find there, will apply as such to VFP 9).
In the following paragraphs, I give some practical information on how to access VFP databases and their tables.
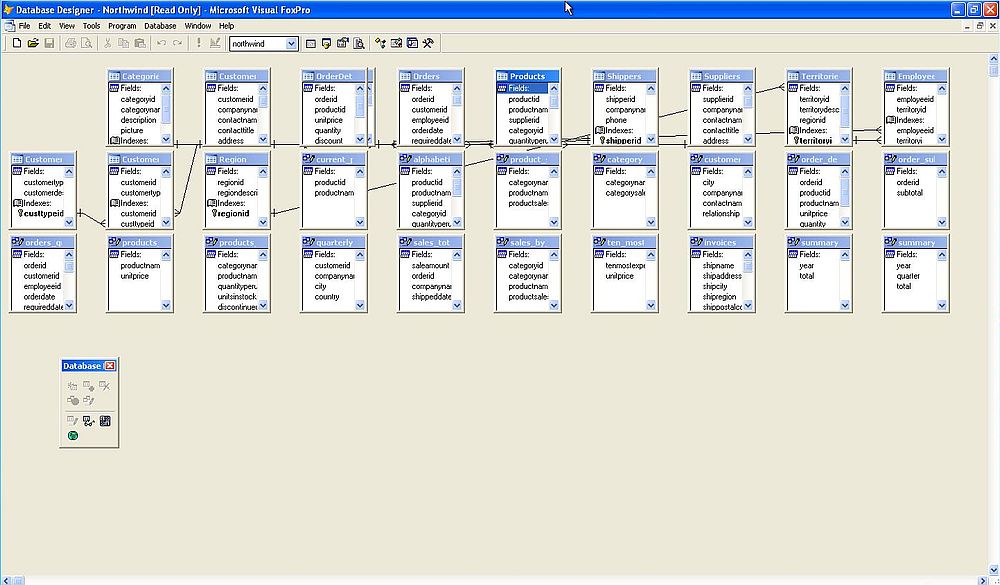
You can open a database from the Task Pane Manager, by choosing Open > Database from the File menu, or by double-clicking a .dbc file in Windows File Explorer. The display will be a visual representation of the database's tables and their relationship. The screenshot shows the layout of the NorthWind database, included with the installation files.
|
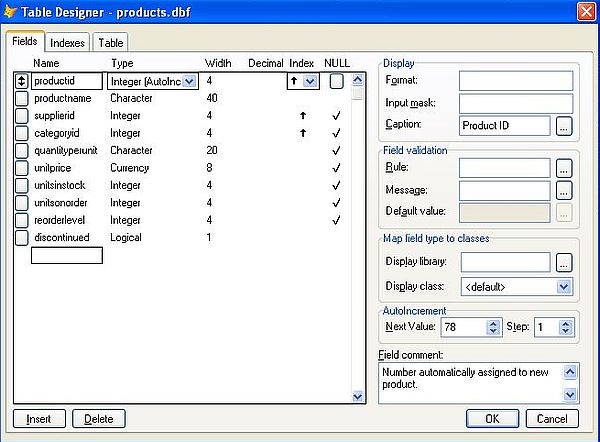
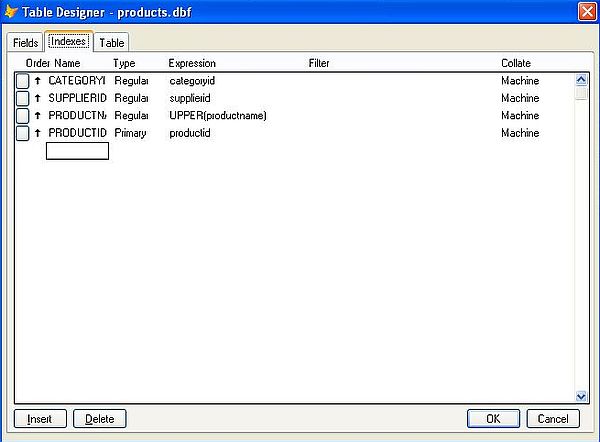
In the database layout window, right-click a table, and from the opening context menu choose Modify. This opens the table structure window. The screenshot on the left shows the fields of the table products.dbf, the screenshot on the right shows this table's indexes.
|
|
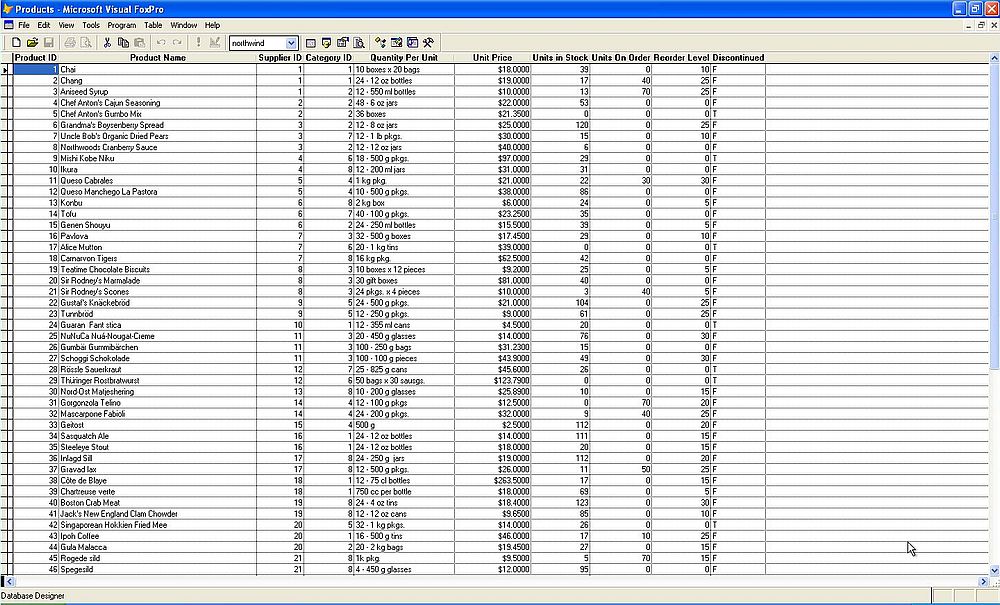
Double-clicking a table in the database layout window, will show the table content (the data records).
|
You can open a table (by the way, note that VFP supports tables that are not part of any database; these are called "free tables") by choosing File > Open > Table from the menu bar, or by double-clicking a .dbf file in Windows File Explorer. Using the second way, the table content is shown; using the first way, nothing seems to happen. For both ways, you can open the table structure window by choosing View > Open table designer from the menu bar; the data records can be displayed by choosing View > Browse table <table-name>.
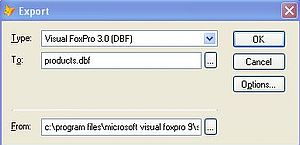
The data records stored in DBF tables can be exported to a whole series of formats using File > Export from the menu bar. The screenshot below shows the dialog box during the export of the NorthWind table products.dbf to a table named products.dbf using the Visual FoxPro 3.0 format. To select the source table use the "browse" button to select it; the default path of the destination table is "C:\Documents and Settings\<user-name>\Visual FoxPro Projects". You can set export options, using the corresponding button. In particular, you can choose which fields you want to export.
|
To create indexes on a table, open the .dbf file using File > Open > Table from the menu bar. Be sure that the checkbox "Open exclusive" is checked! View the table structure in Table Designer. For each field that you want to be indexed, click in the "Index" column and choose to either do an ascending or a descending sort of the index values. The screenshot on the left shows how I created indexes for the fields "productid", "productnam", "categoryid", and "supplierid" of the newly created product.dbf table. If now you change to the "Indexes" tab of the window, you can choose what type of index should be used. I chose a "regular index" for all 4 fields (screenshot on the right). When done, a file with same name as the table, and the file name extension .cdx (in our case: products.cdx) is created in the directory containing the .dbf file.
![Visual FoxPro 9 on Windows XP: Index creation [1] Visual FoxPro 9 on Windows XP: Index creation [1]](../screenshots/winxp_vfp11a.jpg)
|
![Visual FoxPro 9 on Windows XP: Index creation [2] Visual FoxPro 9 on Windows XP: Index creation [2]](../screenshots/winxp_vfp11b.jpg)
|
Note: It's obvious that choosing a regular index (index that may have duplicates) is a bad choice for "productid", that in a RDBMS would be a primary key. In fact, I first chose the index of "productid" to be a cardinal index (no duplicate values allowed), but this resulted later-on in problems. I did not take the time to figure out what were the exact reasons of these problems, nor how to solve them. So, I changed the index to type "regular", what lets the responsibility to ensure data integrity to the programmer of the application using the table. This is, of course, not the correct way to do! In my case, the table being just a test object for my Lazarus/Free Pascal applications, the usage of a regular index is acceptable...
Accessing VFP 9 tables from Lazarus/Free Pascal.
I have written two simple Lazarus/Free Pascal applications that show how to access the Visual Fox Pro table created in this tutorial.
The first one searches for the products from a given supplier (supplier ID entered by the user).
![Visual FoxPro 9 on Windows XP: Lazarus/Free Pascal application [1] Visual FoxPro 9 on Windows XP: Lazarus/Free Pascal application [1]](../screenshots/winxp_vfp11.jpg)
|
The second one may be used to add new products to the table, as well as to delete or modify existing products.
![Visual FoxPro 9 on Windows XP: Lazarus/Free Pascal application [2] Visual FoxPro 9 on Windows XP: Lazarus/Free Pascal application [2]](../screenshots/winxp_vfp12.jpg)
|
For details about these program samples (including the download link of the source code), please have a look at my tutorial Reading from and writing to Visual FoxPro tables in the Free Pascal Programming section of my website.
If you like this page, please, support me and this website by signing my guestbook.