Installing VSCode on Windows 10.
Visual Studio Code is a lightweight but powerful source code editor which runs on your desktop and is available for Windows, macOS and Linux. It comes with built-in support for JavaScript, TypeScript and Node.js and has a rich ecosystem of extensions for other languages and runtimes (such as C++, C#, Java, Python, PHP, Go, .NET).
The paragraph is how Microsoft describe their open source and entirely free product on their Visual Studio Code website. Click the following link to download the VSCode installer. The tutorial is about VSCode 1.82.2, x64 on Windows 10. It should apply to other versions of VSCode, as well as to Windows 11 (maybe that for older versions of Windows, you'll need to find an older version of VSCode).
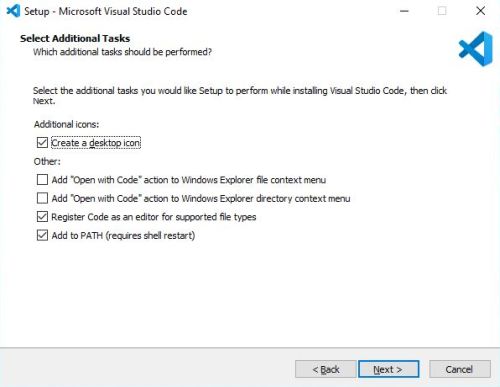
The installation is straight forward: Accept the license agreement, accept the default installation path (or choose a custom one), then choose which additional tasks should be performed. Adding VSCode to the PATH environment variable may be needed in some cases.
|
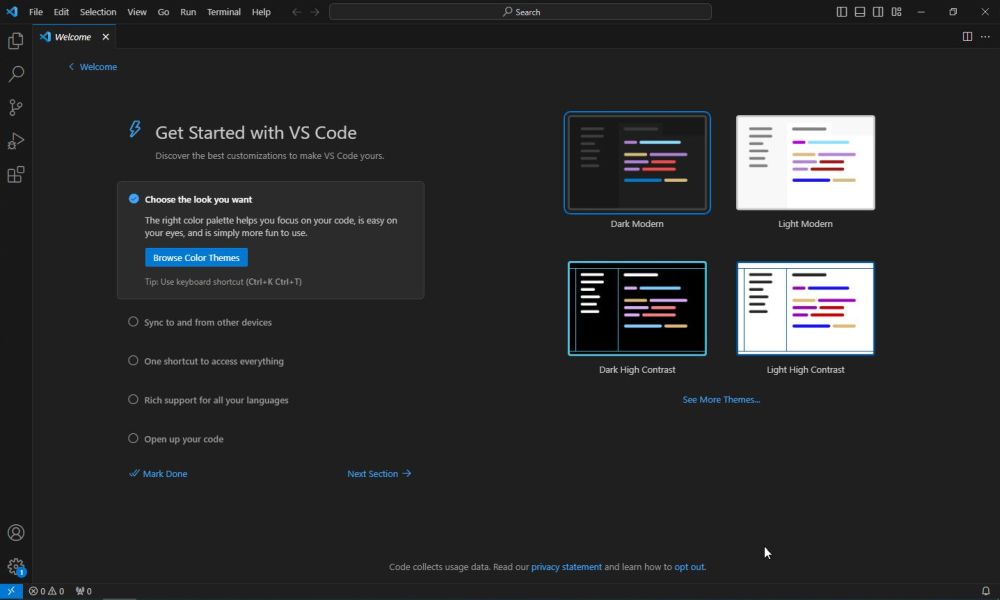
The screenshot below shows the VSCode Welcome window, as it presents when running VSCode for the first time. The IDE is rather complex, especially if you are not used to this type of interface. The article VSCode GUI tour: Explore The Elements of This Powerful IDE at the Python Land website could be helpful.
|
Using VSCode to build C/C++ applications.
VSCode may be used with lots of programming languages and allows the build of applications for other platforms than Windows. To use a given programming language, you essentially need two things (that you have to install before you are able to build applications):
- A VSCode extension specific for that programming language.
- The build tools (compiler, linker, debugger) for that programming language.
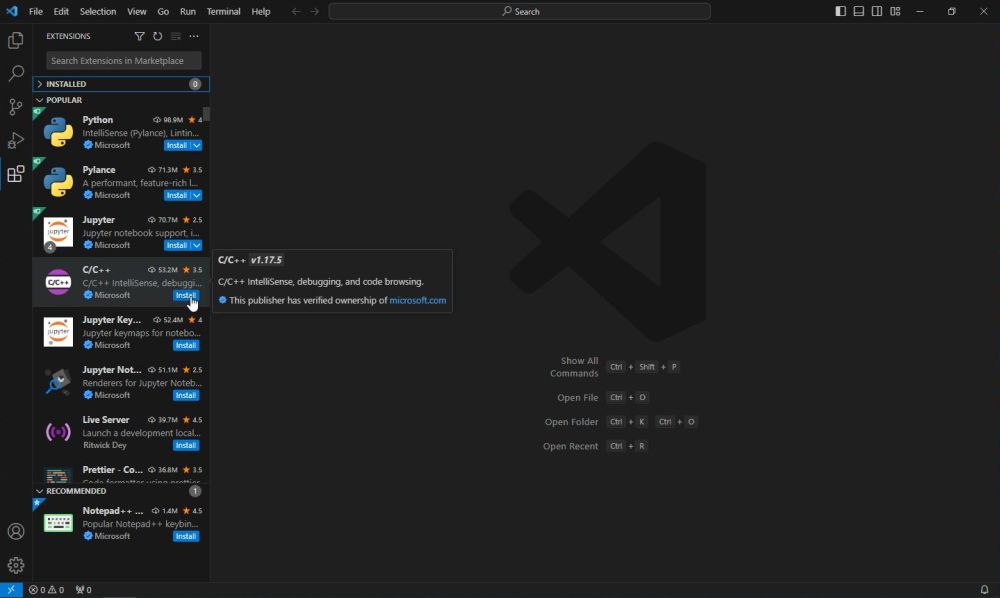
Use the last icon in the VSCode Sidebar to open the Extensions tab. Drop down the listbox of popular extensions and select the C/C++ for Visual Studio Code extension. Click the Install button to install it.
|
Note: To install an extension this way, you need an Internet connection. An alternative is to download the extension and install it from the downloaded file. To do this, in the Extensions tab, click the three-dots icon in the tab menu, and from the options showing up, choose Install from VSIX.
There are lots of C/C++ compilers available for free, in particular the one from Microsoft themselves. The (probably) best choice, however, is to use the GCC C/C++ compiler and GDB debugger from MinGW-w64. The simplest way is to get the latest version of MinGW-w64 via MSYS2 that provides up-to-date native builds of GCC, MinGW-w64, and other helpful C++ tools and libraries. This will provide you with the necessary tools to compile your code, debug it, and configure it to work with IntelliSense. Click the following link to download the MSYS2 installer from github. I actually use MSYS2 2023-05-26; I suppose that newer versions will work the same way as described here.
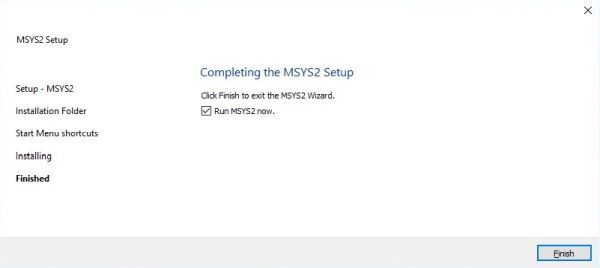
As always when an application's default installation directory is directly beneath the C: root, I changed it to C:\Programs\msys64. In the last window of the setup program, be sure that the Run MSYS2 now checkbox is selected. Push the Finish button, to terminate the installer.
|
When the installation is finished, a MSYS2 terminal opens. In order to install the MinGW-w64
toolchain, enter the following command (Internet connection needed):
pacman -S --needed base-devel mingw-w64-ucrt-x86_64-toolchain
Hit ENTER to accept the default installation (i.e. the installation of all packages available in the toolchain).
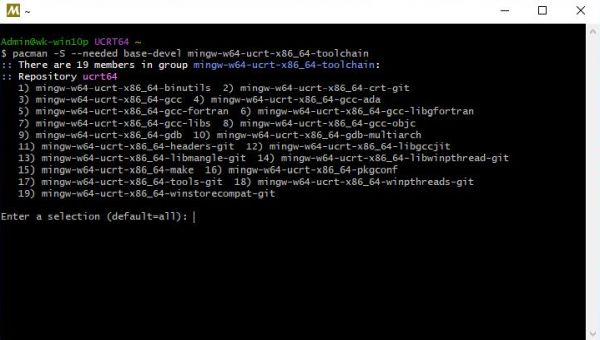
|
You'll have to add the path to the MinGW-w64 bin folder to the PATH environment variable. If you have other C compilers installed on your
system, as, for example, in the case where you have installed Strawberry Perl, make sure that the MinGW-w64 path precedes the path to
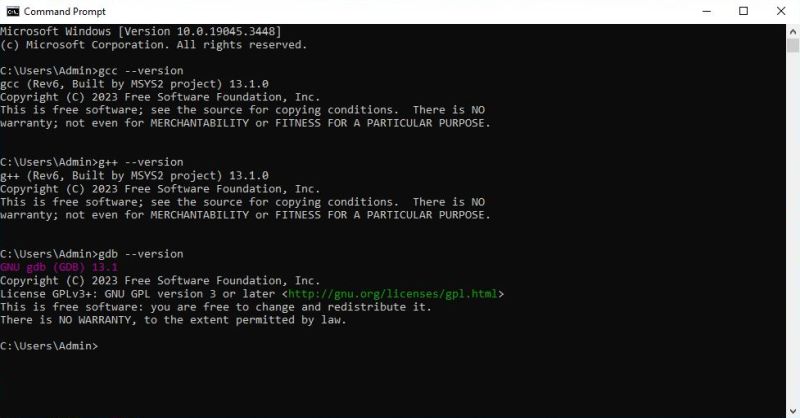
the Strawberry Perl bin folder, otherwise the wrong build tools will be used. To check if all is as it should, open Command Prompt and enter the following commands:
gcc --version
g++ --version
gdb --version
The output of these commands should look like the one on the screenshot below.
|
There are several ways to start a new project; here is how I proceed:
- In Windows File Explorer, create a new folder for the new project.
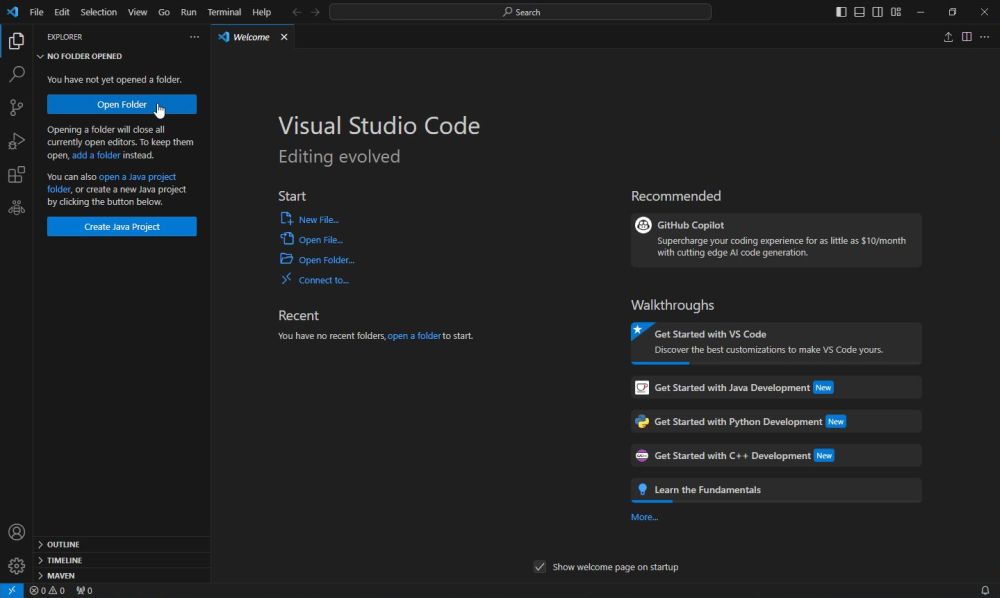
- In the VSCode Sidebar, choose Explorer (first icon on the bar), then push the Open Folder button (first screenshot below). Browse to the newly created project folder to open it.
- A dialog box pops up, asking you if you trust the authors of the files in this folder. Push the Yes I trust the authors button to confirm.
- In the main window, click the New file... link and create the file that will contain your (main) source code (first screenshot below).
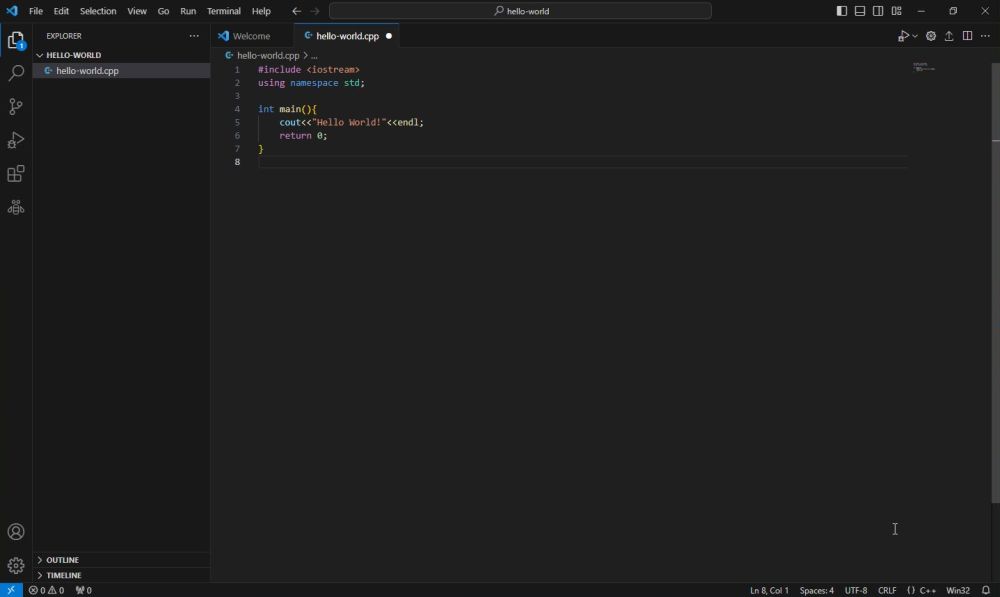
- Selecting this file in the Explorer window, opens it in the main window for editing. Add your source code now (second screenshot below).
|
|
Building C++ applications.
Here is the C++ code of a simple "Hello World" program.
#include <iostream>
using namespace std;
int main(){
cout<<"Hello World!"<<endl;
return 0;
}
Add this code in the VSCode editor (file hello-world.cpp, as shown on the screenshot above). In the VSCode Sidebar, choose Run and Debug Run (fourth icon on the bar), then push the Run and debug button. At the top of the main window, the supported compilers for C++ will be displayed: C++ (GDB/LLDB) and C++ (Windows). The first one is the GNU compiler and debugger that we have installed before and that we will use here; the second one is the Microsoft C++ compiler (normally not installed).
![VSCode - Building a C++ project: Choosing the GNU C++ compiler [1] VSCode - Building a C++ project: Choosing the GNU C++ compiler [1]](../screenshots/vscode8a.jpg)
|
Then choose C/C++: g++.exe build and debug active file.
![VSCode - Building a C++ project: Choosing the GNU C++ compiler [2] VSCode - Building a C++ project: Choosing the GNU C++ compiler [2]](../screenshots/vscode8b.jpg)
|
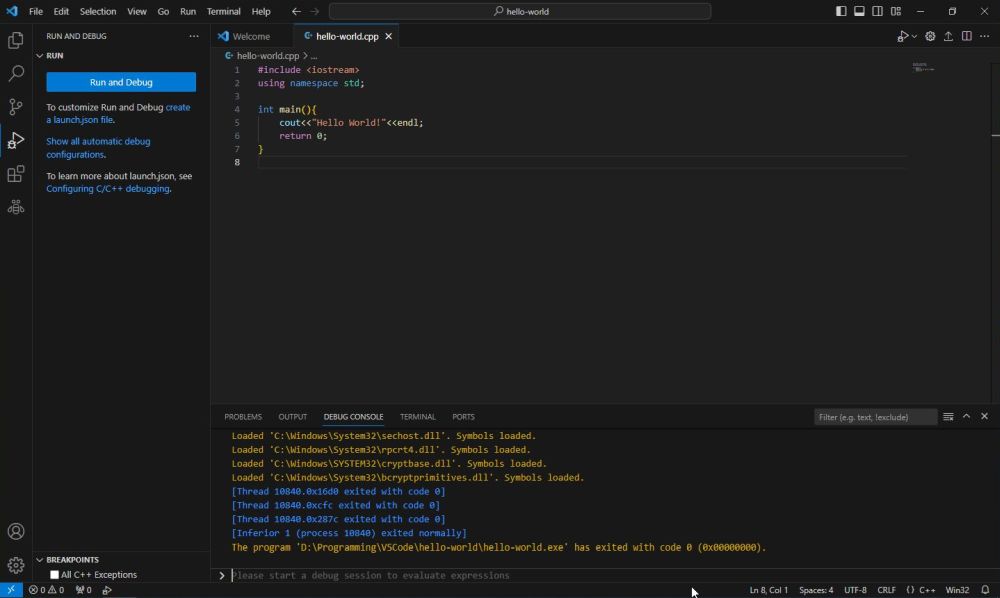
If all works correctly, the build terminates with return code 0, and you can see the build log in the Debug console tab of the Messages window.
|
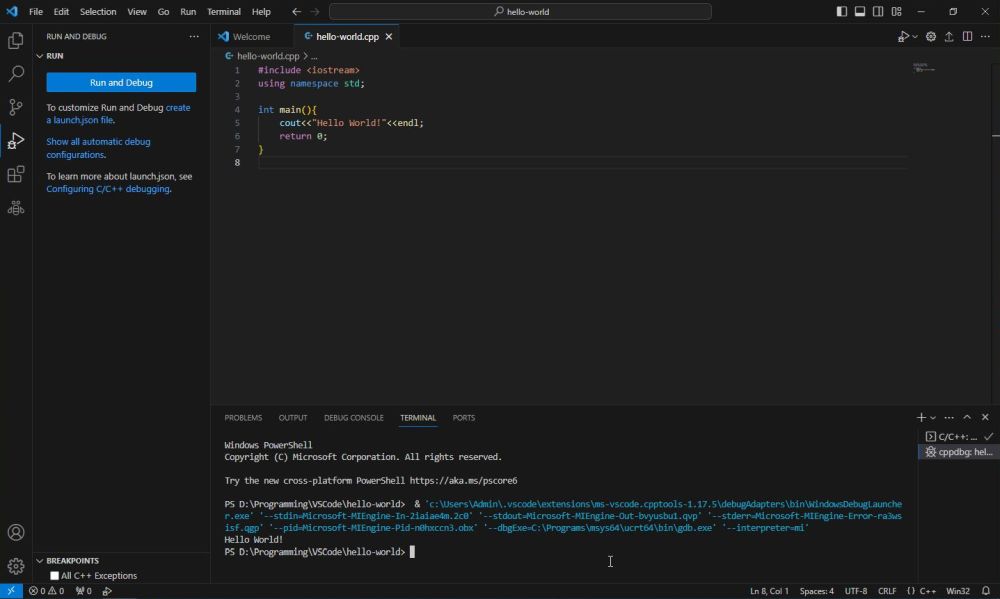
To view the program output, have a look at the Terminal tab of the Messages window.
|
Building C applications.
Here is the C code of a simple matrix addition program.
// C program to find the sum of two matrices of order 2*2
#include <stdio.h>
int main() {
float a[2][2], b[2][2], result[2][2];
printf("Enter elements of 1st matrix\n");
for (int i = 0; i < 2; ++i) {
for (int j = 0; j < 2; ++j) {
printf("Enter a%d%d: ", i + 1, j + 1);
scanf("%f", &a[i][j]);
}
}
printf("Enter elements of 2nd matrix\n");
for (int i = 0; i < 2; ++i) {
for (int j = 0; j < 2; ++j) {
printf("Enter b%d%d: ", i + 1, j + 1);
scanf("%f", &b[i][j]);
}
}
for (int i = 0; i < 2; ++i) {
for (int j = 0; j < 2; ++j) {
result[i][j] = a[i][j] + b[i][j];
}
}
printf("\nSum Of Matrix:\n");
for (int i = 0; i < 2; ++i) {
for (int j = 0; j < 2; ++j) {
printf("%.1f\t", result[i][j]);
if (j == 1) {
printf("\n");
}
}
}
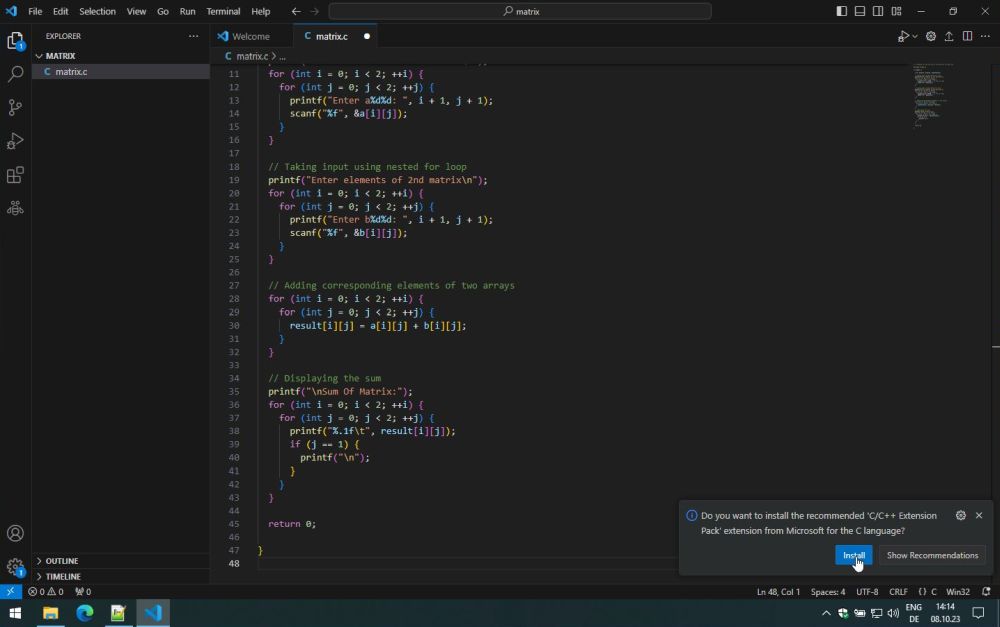
Open the new folder "matrix" and create a new file "matrix,c". Enter the code above into the VSCode editor for this file. I think it was at this moment where the IDE asked if I wanted to install the recommended C/C++ extension (actually the C/C++ Extension Pack), as shown on the screenshot below. I did install it...
|
Trying to do as with C++ before (choosing Run and Debug Run from the Sidebar, then pushing the Run and debug button, and selecting C++ (GDB/LLDB) and then C/C++: gcc.exe build and debug active file did not work for me: The task started, but finished by hanging (?).
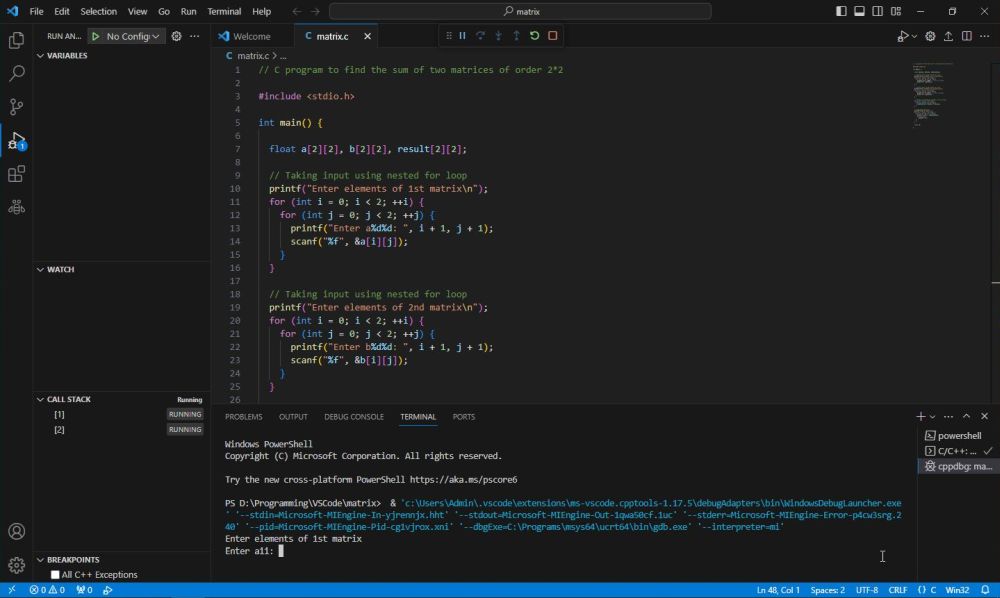
But, there is another way: Just push the Run button (triangle icon at the right side of the second horizontal command bar). This builds the project and, if all is ok, runs the executable.
|
The screenshot below shows the execution of matrix.exe in Command Prompt.

|
If you find this text helpful, please, support me and this website by signing my guestbook.