Printing from a Lazarus/Free Pascal program for beginners.
Using a printer with Lazarus/Free Pascal is not really complicated. This tutorial is an introduction to the usage of the Printer4Lazarus package in order to print from a Lazarus/Free Pascal program or application. It is intended for beginners (people knowing Lazarus and Free Pascal, but never did some printing from their programs). All program samples have been build and tested on Windows 10 (using Lazarus 2.2.6). I suppose that they also work with other Windows releases; no idea how far they work on Linux or macOS.
There are 2 prerequisites to use a printer from a Lazarus/Free Pascal program:
- The package Printer4Lazarus has to be added to the project requirements. To do this, open Project Inspector, and push the Add button. This extends a drop-down list with several options. Choose New Requirement. This opens a new window showing the available packages. From the package name listbox, select Printer4Lazarus.
- The unit Printers must be included into the project. To do this, add it to your uses statement.
- To print from a command line program, the units Interfaces and OSPrinters have to be included into the project. Add them to your uses statement, too.
The main object used in printing related programs is of class TPrinter. Adding the Printers unit to the uses statement, makes a TPrinter object, called Printer permanently available to your code. With this object, "printing proceeds in an orderly fashion".
Here is a global overview of how to print from Lazarus/Free Pascal:
- The print process is started by calling the method TPrinter.BeginDoc. This method is actually not more than an initialization of the printing environment.
- The printer uses a TPrinter.Canvas object to draw the output on. It is this drawing that ends up on the printed page.
- Print options, like the font, its size and its color are set as properties of the TPrinter.Canvas object.
- Everything that we draw onto the canvas, e.g. printing text using the TPrinter.Canvas.TextOut() method, must be positioned using an x-coordinate and y-coordinate. These coordinates have to be specified in dots.
- The print process is terminated by calling the method TPrinter.EndDoc. It's only when calling this method that our "drawing" is sent to the printer.
Here is the code of a very rudimentary command line program, that prints the text "Hello, World!" using the Windows default printer (project printing1.lpi).
program printing1;
uses
Interfaces, Printers, OsPrinters, printer4lazarus;
begin
Printer.BeginDoc;
Printer.Canvas.Font.Name := 'Courier New';
Printer.Canvas.Font.Size := 20;
Printer.Canvas.Font.Color := $ff0000;
Printer.Canvas.TextOut(100, 100, 'Hello, World!');
Printer.EndDoc;
end.
The program prints the text using the font "Courier New", with a size of 20 points, and a blue color. The text is printed at page position (100, 100).
Note: The color values are RGB values, but as Intel processors are little-endian, the 3 RGB components have to be stored in reverse order. For "blue": R = 00, G = 00, B = ff; thus the value to assign to Printer.Canvas.Font.Color equals $ff0000 (and not $0000ff). To find the HTML and Free Pascal code for a whole bunch of common colors, you can try my web application Color picker 2019.
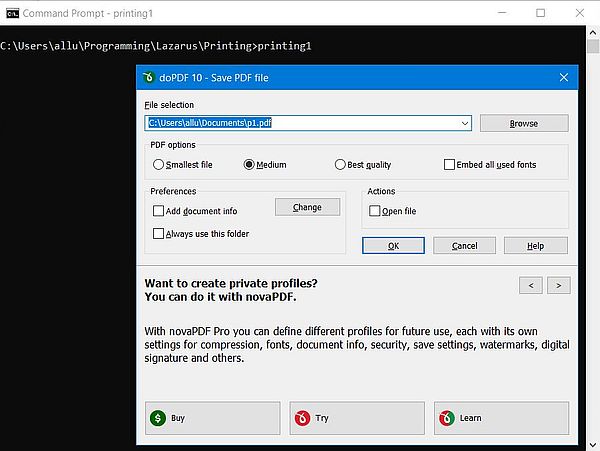
The screenshot below shows the execution on my Windows 10, where the default printer actually is a virtual doPDF printer; thus the output, that would be printed with a physical printer, is saved as a PDF file instead.
 |
And here is the printer output.
 |
Note: The way how the output on the printer looks like not only depends on the printer settings in our program, but also from the settings of the printer itself, in particular from the paper type (A4, A5, Letter, Legal, ...) and the printer DPI settings (typical values: 72, 300, 600, 1200 DPI). The doPDF printer, used in the tutorial examples, uses A4 paper (landscape orientation) and prints with 300 DPI.
When printing several lines, we have to know the line-height in order to properly space the different lines. The line-height depends on the
text-height, of course, this one being available as TPrinter.Canvas.TextHeight(). To calculate the line height, use
the following code:
LineHeight := Round(1.2 * Abs(TPrinter.Canvas.TextHeight('I')));
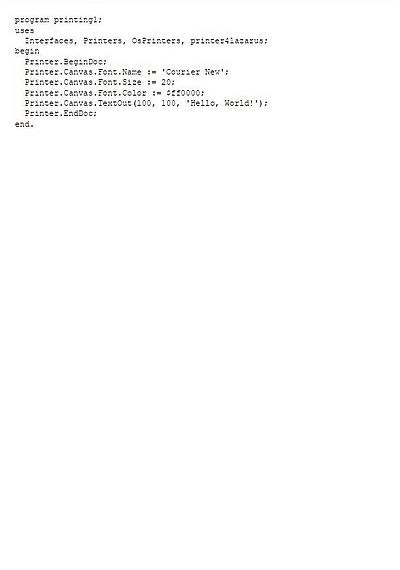
The following program (project printing2.lpi) prints out the content of the file printing1.lpr.
program printing2;
uses
Interfaces, Printers, OsPrinters, printer4lazarus;
const
HMargin = 100;
VMargin = 100;
var
YPos: Integer;
Line: string;
InFile: Text;
begin
Printer.BeginDoc;
Printer.Canvas.Font.Name := 'Courier New';
Printer.Canvas.Font.Size := 12;
Printer.Canvas.Font.Color := $000000;
Assign(InFile, 'printing1.lpr'); Reset(InFile);
YPos := VMargin;
while not EoF(InFile) do begin
Readln(InFile, Line);
if Line <> '' then begin
Printer.Canvas.TextOut(HMargin, YPos, Line);
YPos += Round(1.2 * Abs(Printer.Canvas.TextHeight('I')));
end;
end;
Close(InFile);
Printer.EndDoc;
end.
Here is the printer output.
 |
To do serious printing, we have to know the size of the paper, i.e. the number of dots of the paper width and height. These values actually depend on the printer's DPI settings. For an A4 page, we have (values from the Lazarus Wiki):
| DPI | Paper size |
|---|---|
| 72 | 595 x 842 |
| 300 | 2480 x 3507 |
| 600 | 4960 x 7014 |
| 1200 | 9920 x 14028 |
There is also a simple way to retrieve the width and height of the paper of our default printer by program code. The following small program (project printing3.lpi) simply displays these values.
program printing3;
uses
Interfaces, Printers, OsPrinters, printer4lazarus;
var
PaperSize: TPaperSize;
begin
PaperSize := Printer.PaperSize;
Writeln('Paper size: Width = ', PaperSize.Width:5);
Writeln(' Height = ', PaperSize.Height:5);
end.
In the case of my 300 DPI doPDF printer with A4 paper, the values returned are: width = 2480, height = 3508.
Whereas knowing the text-height is fundamental for proper printing, knowing the text width becomes important in certain circumstances, too: Aligning text to the right or at the page center, printing columns, and also when we have to print lines that exceed the page width. The width in dots of a given text may be retrieved using the method TPrinter.Canvas.TextWidth().
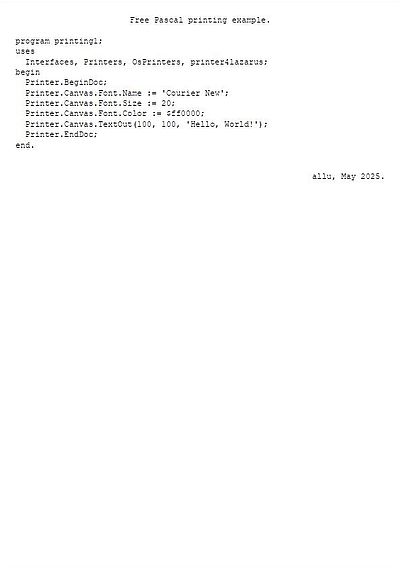
The following program (project printing4.lpi) prints the file printing1.lpr, adding a centered title, and after the code, adds the name of the author, right-aligned.
program printing4;
uses
Interfaces, Printers, OsPrinters, printer4lazarus;
const
Title = 'Free Pascal printing example.';
Author = 'allu, May 2025.';
HMargin = 100;
VMargin = 100;
var
LineHeight, XPos, YPos, TitleLength, AuthorLength: Integer;
Line: string;
InFile: Text;
PaperSize: TPaperSize;
begin
Printer.BeginDoc;
PaperSize := Printer.PaperSize;
Printer.Canvas.Font.Name := 'Courier New';
Printer.Canvas.Font.Size := 12;
Printer.Canvas.Font.Color := $000000;
LineHeight := Round(1.2 * Abs(Printer.Canvas.TextHeight('I')));
TitleLength := Printer.Canvas.TextWidth(Title);
XPos := (PaperSize.Width - TitleLength) div 2;
YPos := VMargin;
Printer.Canvas.TextOut(XPos, YPos, Title);
XPos := HMargin;
YPos += 2 * LineHeight;
Assign(InFile, 'printing1.lpr'); Reset(InFile);
while not EoF(InFile) do begin
Readln(InFile, Line);
if Line > '' then begin
Printer.Canvas.TextOut(XPos, YPos, Line);
YPos += LineHeight;
end;
end;
Close(InFile);
AuthorLength := Printer.Canvas.TextWidth(Author);
XPos := PaperSize.Width - HMargin - AuthorLength;
YPos += 2 * LineHeight;
Printer.Canvas.TextOut(XPos, YPos, Author);
Printer.EndDoc;
end.
Here is the printer output.
 |
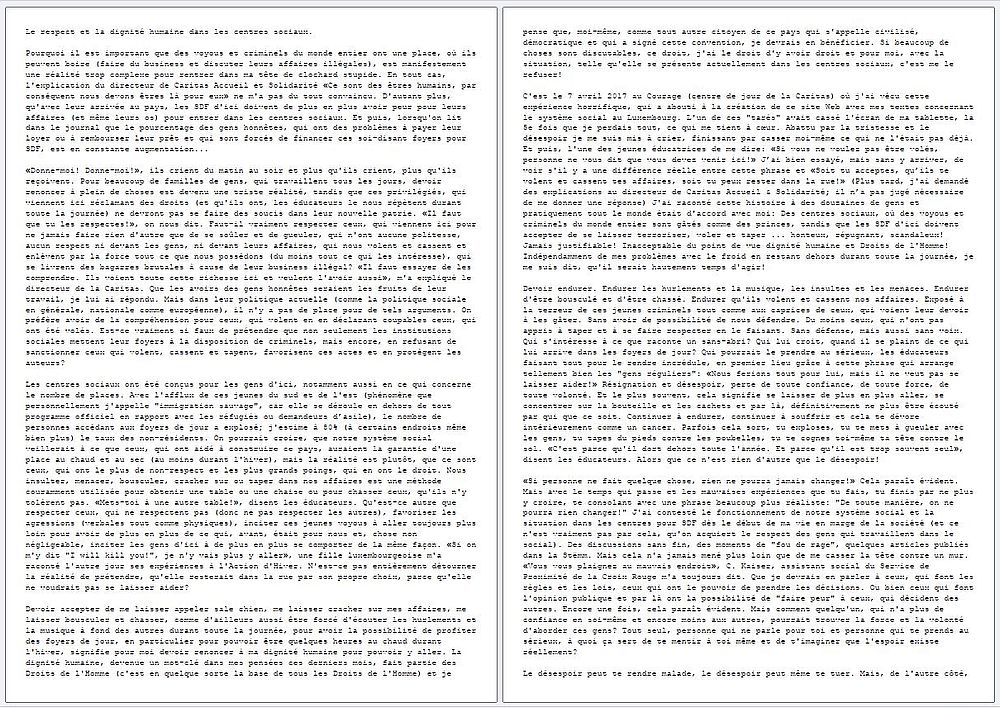
The Lazarus GUI project Printing5.lpi prints a text-file selected by the user. The program checks for lines that do not fit into the page width and continues those in the next line, preserving the integrity of whole words. Also, it starts a new page when the next line would print outside the bottom margin.
Here is the full code of the main project unit. Remember that you have to add Printer4Lazarus to the project requirements.
unit printing5_main;
{$mode objfpc}{$H+}
interface
uses
Classes, SysUtils, Forms, Controls, Graphics, Dialogs, StdCtrls, Printers;
type
TLines = array of AnsiString;
{ TfPrinting5 }
TfPrinting5 = class(TForm)
StaticText1: TStaticText;
Label1, Label2: TLabel;
edFile: TEdit;
btBrowse: TButton;
btPrint: TButton;
btExit: TButton;
dlgOpen: TOpenDialog;
procedure FormCreate(Sender: TObject);
procedure btBrowseClick(Sender: TObject);
procedure btPrintClick(Sender: TObject);
procedure btExitClick(Sender: TObject);
private
sDir: string;
aLines: TLines;
end;
var
fPrinting5: TfPrinting5;
implementation
{$R *.lfm}
{ Read text file selected by user }
procedure ReadFile(FileName: string; out Lines: TLines);
var
N: Integer;
InFile: Text;
begin
Assign(InFile, FileName); Reset(InFile);
N := 0;
while not EoF(InFile) do begin
Inc(N);
SetLength(Lines, N);
Readln(InFile, Lines[N - 1]);
end;
Close(InFile);
end;
{ Advance printhead 1 line; new line if bottom of page reached }
procedure AdvanceLine(Printer: TPrinter; var Y: Integer; VM, LH: Integer);
begin
Y += LH;
if Y >= Printer.PaperSize.Height - VM - LH then begin
Printer.NewPage;
Y := VM;
end;
end;
{ TfPrinting5 }
{ Application start }
procedure TfPrinting5.FormCreate(Sender: TObject);
begin
sDir := GetCurrentDir;
end;
{ Button "Browse" pushed: User selection of the file to be printed }
procedure TfPrinting5.btBrowseClick(Sender: TObject);
var
FileName: string;
begin
dlgOpen.InitialDir := sDir;
dlgOpen.FileName := '';
if dlgOpen.Execute then begin
// User has selected a file
Filename := dlgOpen.FileName;
edFile.Text := FileName;
sDir := ExtractFileDir(Filename);
ReadFile(FileName, aLines);
end;
end;
{ Button "Print" pushed: Print file content to default printer }
procedure TfPrinting5.btPrintClick(Sender: TObject);
const
HMargin = 100;
VMargin = 100;
var
LineHeight, XPos, YPos, I, J, J0: Integer;
Line, Line0: AnsiString;
begin
try
Printer.BeginDoc;
Printer.Canvas.Font.Name := 'Courier New';
Printer.Canvas.Font.Size := 10;
Printer.Canvas.Font.Color := $000000;
LineHeight := Round(1.2 * Abs(Printer.Canvas.TextHeight('I')));
YPos := VMargin; XPos := HMargin;
for I := 0 to Length(aLines) - 1 do begin
// For each text line of the file
Line := aLines[I];
if Printer.Canvas.TextWidth(Line) <= Printer.PaperSize.Width - 2 * HMargin then begin
// If the line fits into the page width, print it
Printer.Canvas.TextOut(XPos, YPos, Line);
AdvanceLine(Printer, YPos, VMargin, LineHeight);
end
else begin
// If the line doesn't fit into the page width, print it over several lines
repeat
Line0 := '';
J := 1; J0 := -1;
while (J < Length(Line)) and (Printer.Canvas.TextWidth(Line0) <= Printer.PaperSize.Width - 2 * HMargin) do begin
if Line[J] = ' ' then
J0 := J;
Line0 += Line[J];
Inc(J);
end;
if J = Length(Line) then begin
// Print rest of the line (now fitting on the page)
Printer.Canvas.TextOut(XPos, YPos, Line);
AdvanceLine(Printer, YPos, VMargin, LineHeight);
Line := '';
end
else begin
// Print the actual part of the line
Printer.Canvas.TextOut(XPos, YPos, Copy(Line, 1, J0 - 1));
AdvanceLine(Printer, YPos, VMargin, LineHeight);
Delete(Line, 1, J0);
end;
until Line = '';
end;
end;
finally
Printer.EndDoc;
MessageDlg('Print', 'File has successfully been printed!', mtInformation, [mbOK], 0);
end;
end;
{ Button "Exit" pushed: Exit the application }
procedure TfPrinting5.btExitClick(Sender: TObject);
begin
Close;
end;
end.
Notes:
- A new page has to be started if the next line felt outside the bottom margin of the page, i.e. when the next vertical position is greater than the position of the margin. In fact, this is not entirely true. As printing is done downward from the vertical position, the line height has also to be considered when determining the moment where a new page must be started. To do so, simply call the TPrinter.NewPage method.
- I guess that my algorithm to break long lines with preservation of whole words is not the most canny one, but it works fine. What I do is the following: If the line fits into the page width, I just print it out. If not, I decompose the line into several parts and print them out individually in successive lines. To determine the part of the line to be printed in a given line, I search the line for spaces, remembering the position in the line of the last space found, until the substring from the beginning of the line up to the actually viewed character fits onto the page (or until the end of the line is reached). I then print out the substring, delete this substring from the line string, and start over searching for spaces.
The file that I used to test my application is a text that I copied from one of my "homeless" web pages. It is made of a title and 8 long lines of text (remember that there are no line breaks within the HTML text that form a paragraph). The screenshot (the first two pages of the printer output) shows how these long lines are broken into several successive lines, whole words always being preserved as such. Also, note the start of the second page, when the first one is "full".
 |
Note: It's obvious that with such long lines the data type string, limited to 255 characters cannot be used. So, I decided to use AnsiString. That this works all correctly, printing non-ASCII characters like à, ù, ç as it should be, surprised me, and I don't not really know why this is so. On the other hand, trying to use UTF8String (including the LazUTF8 unit and replacing all "normal" functions/procedures by their UTF8 equivalent), totally failed, the position where to break the line not being correctly detected (?).
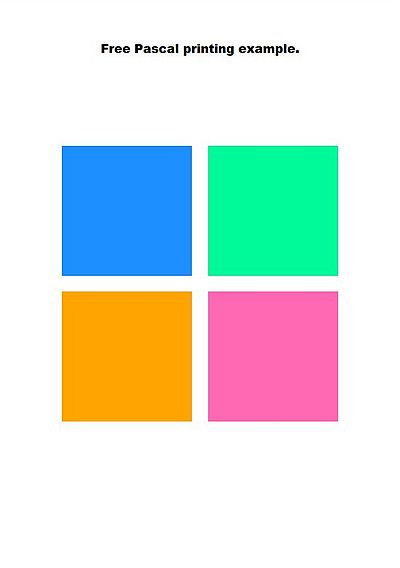
The printer canvas can of course not only be used to draw text, but also to draw graphics. The following program sample (project printing6.lpi) prints 4 colored rectangles at the center of the page.
program printing6;
uses
Interfaces, Printers, OsPrinters, printer4lazarus;
const
Title = 'Free Pascal printing example.';
var
XPos, YPos, TitleLength, XCenter, YCenter: Integer;
PaperSize: TPaperSize;
begin
Printer.BeginDoc;
PaperSize := Printer.PaperSize;
Printer.Canvas.Font.Name := 'Arial Black';
Printer.Canvas.Font.Size := 18;
Printer.Canvas.Font.Color := $000000;
TitleLength := Printer.Canvas.TextWidth(Title);
XPos := (PaperSize.Width - TitleLength) div 2; YPos := 250;
Printer.Canvas.TextOut(XPos, YPos, Title);
XCenter := PaperSize.Width div 2;
YCenter := PaperSize.Height div 2;
Printer.Canvas.Brush.Color := $ff901e;
Printer.Canvas.FillRect(XCenter - 850, YCenter - 850, XCenter - 50, YCenter - 50);
Printer.Canvas.Brush.Color := $9afa00;
Printer.Canvas.FillRect(XCenter + 50, YCenter - 850, XCenter + 850, YCenter - 50);
Printer.Canvas.Brush.Color := $00a5ff;
Printer.Canvas.FillRect(XCenter - 850, YCenter + 50, XCenter - 50, YCenter + 850);
Printer.Canvas.Brush.Color := $b469ff;
Printer.Canvas.FillRect(XCenter + 50, YCenter + 50, XCenter + 850, YCenter + 850);
Printer.EndDoc;
end.
Here is the printer output.
 |
So, we have printed text, we have printed graphics, what about printing pictures? The basics to do so are really simple, thanks to the TPrinter.Canvas.Draw() method.
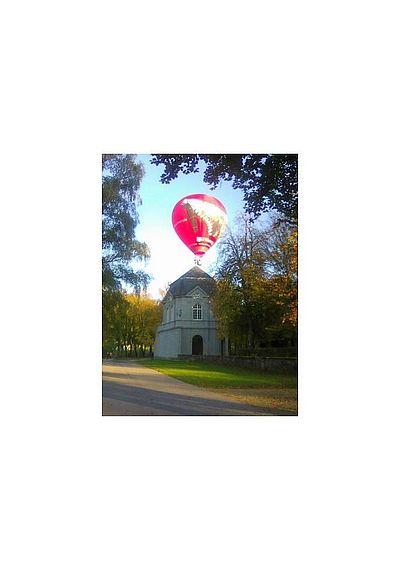
The following GUI application (project Printing7.lpi) prints the picture stored in a file selected by the user. The picture is printed at the center of the page, using the original picture width and height. Here is the full code of the main project unit.
unit printing7_main;
{$mode objfpc}{$H+}
interface
uses
Classes, SysUtils, Forms, Controls, Graphics, Dialogs, StdCtrls, ExtCtrls, Printers;
type
{ TfPrinting7 }
TfPrinting7 = class(TForm)
StaticText1: TStaticText;
Label1, Label2: TLabel;
edFile: TEdit;
imPic: TImage;
btBrowse: TButton;
btPrint: TButton;
btExit: TButton;
dlgOpen: TOpenDialog;
procedure FormCreate(Sender: TObject);
procedure btBrowseClick(Sender: TObject);
procedure btPrintClick(Sender: TObject);
procedure btExitClick(Sender: TObject);
private
sDir: string;
end;
var
fPrinting7: TfPrinting7;
implementation
{$R *.lfm}
{ TfPrinting7 }
{ Application start }
procedure TfPrinting7.FormCreate(Sender: TObject);
begin
sDir := GetCurrentDir;
end;
{ Button "Browse" pushed: User selection of the image to be printed }
procedure TfPrinting7.btBrowseClick(Sender: TObject);
var
FileName: string;
begin
dlgOpen.InitialDir := sDir;
dlgOpen.FileName := '';
if dlgOpen.Execute then begin
// User has selected a file
Filename := dlgOpen.FileName;
edFile.Text := FileName;
sDir := ExtractFileDir(Filename);
imPic.Picture.LoadFromFile(Filename);
end;
end;
{ Button "Print" pushed: Print image to default printer }
procedure TfPrinting7.btPrintClick(Sender: TObject);
var
WPic, HPic, XPos, YPos: Integer;
begin
WPic := imPic.Picture.Graphic.Width;
HPic := imPic.Picture.Graphic.Height;
XPos := (Printer.PaperSize.Width - WPic) div 2;
YPos := (Printer.PaperSize.Height - HPic) div 2;
try
Printer.BeginDoc;
Printer.Canvas.Draw(XPos, YPos, imPic.Picture.Graphic);
finally
Printer.EndDoc;
MessageDlg('Print', 'Image has successfully been printed!', mtInformation, [mbOK], 0);
end;
end;
{ Button "Exit" pushed: Exit the application }
procedure TfPrinting7.btExitClick(Sender: TObject);
begin
Close;
end;
end.
Note: When the user opens the image file, the picture is stored into an invisible TImage object. It's the TImage.Picture.Graphic object that is used as third parameter of the TPrinter.Canvas.Draw() method.
Here is the printer output (image size = 1200×1600).
 |
What now, if we want to give the picture on the printed page a custom size? Let's suppose that we want to print the picture from above twice, side by side, and with a width
of 800 dots. The first thing to do, of course, is to rescale the picture, in this case to calculate the new height, in order to preserve the aspect ratio. This is
elementary math:
WPic := imPic.Picture.Graphic.Width;
HPic := imPic.Picture.Graphic.Height;
WSPic := 800; Scale := WSPic / WPic;
HSPic := Round(HPic * Scale);
To print a picture with custom width and height, we'll have to define a TRect object. Essentially, it's a rectangular area (where the picture with its new width and height will be drawn into), defined by the four coordinates x1, y1, x2, y2, where (x1, y1) are the coordinates of the top-left corner, and (x2, y2) the coordinates of the bottom-right corner. This TRect object can then be used as first parameter of the method TPrinter.Canvas.StretchDraw(). The second parameter of this method being a TImage.Picture.Graphic object, the picture is stretched into the rectangular area. If the size of the rectangle takes the aspect ratio of the original picture into account, we get a proper enlargement or reduction of the picture; if not, the picture will be distorted.
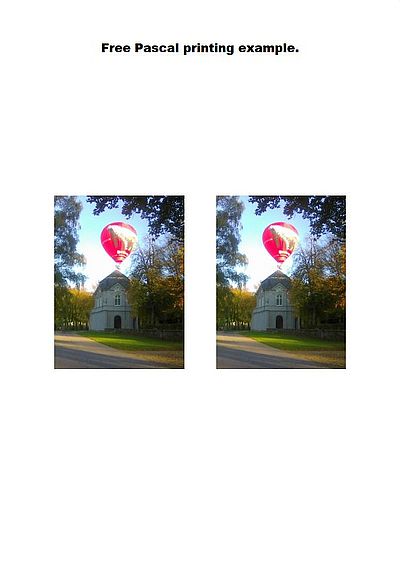
The following command line program (project printing8.lpi) prints the picture of my (former) castle twice, side by side, at the center of the page, and with a picture width of 800 dots.
program printing8;
uses
Classes, Controls, Graphics, ExtCtrls, Interfaces, Printers, OsPrinters, printer4lazarus;
const
Title = 'Free Pascal printing example.';
var
XPos, YPos, TitleLength, XCenter, YCenter, WPic, HPic, WSPic, HSPic: Integer;
Scale: Real;
imPic: TImage;
PicRect: TRect;
PaperSize: TPaperSize;
begin
imPic := TImage.Create(imPic);
imPic.Picture.LoadFromFile('castle.jpg');
WPic := imPic.Picture.Graphic.Width;
HPic := imPic.Picture.Graphic.Height;
WSPic := 800; Scale := WSPic / WPic;
HSPic := Round(HPic * Scale);
Printer.BeginDoc;
PaperSize := Printer.PaperSize;
XCenter := PaperSize.Width div 2;
YCenter := PaperSize.Height div 2;
Printer.Canvas.Font.Name := 'Arial Black';
Printer.Canvas.Font.Size := 18;
Printer.Canvas.Font.Color := $000000;
TitleLength := Printer.Canvas.TextWidth(Title);
XPos := (PaperSize.Width - TitleLength) div 2;
YPos := 250;
Printer.Canvas.TextOut(XPos, YPos, Title);
PicRect := Rect(XCenter - WSPic - 100, YCenter - HSPic div 2, XCenter - 100, YCenter + HSPic div 2);
Printer.Canvas.StretchDraw(PicRect, imPic.Picture.Graphic);
PicRect := Rect(XCenter + 100, YCenter - HSPic div 2, XCenter + 100 + WSPic, YCenter + HSPic div 2);
Printer.Canvas.StretchDraw(PicRect, imPic.Picture.Graphic);
Printer.EndDoc;
end.
Here is the printer output.
 |
This terminates my introduction to printing from Lazarus/Free Pascal programs and applications. You can find some further (more advanced, I would say) information in the article Using the printer in the Free Pascal Wiki.
Also note that you have the possibility to do the print-out in two steps: 1. Creating a PDF document, 2. Printing the PDF. If you are interested in this way to proceed, a look at my tutorial Creating PDF documents using fcl-pdf may be helpful.
To print more "complicated stuff", like database content or calculation based reports, the usage of a report generator (LazReport, FortesReport4lazarus) is probably the better solution. I'll (probably) write a tutorial about those one day...
And finally, here is the link to download the sources of all tutorial samples. Enjoy!
If you find this text helpful, please, support me and this website by signing my guestbook.