System and Security: Performing an external virus check using a Live-CD.
With more and more malware of all kinds being spread over the Internet, a real-time antivirus application is indispensable on every computer, perhaps not really on Linux and less on macOS than on Windows, but, you never do something wrong using one and it's no bad idea either to also install a secondary virus scanner like Malwarebytes Free. However, even with the best antivirus software, your protection will never be 100%. The antivirus application may become infected itself, some viruses may never be found or reveal as impossible to remove. The major reason for this is that some malware "hides within the operating system" and does the operating system convince the antivirus (that doesn't run as standalone application, but runs on the OS) that a given infected file is all ok. Such malware may only be detected and removed performing an external virus check.
The expression external virus check refers to a virus check that is performed from outside the operating system, i.e. without the operating system being running. This is realized by booting the computer from a Live-CD (or an USB stick), a specialized rescue operating system is loaded into memory and all Windows system files and all Windows applications are just static files on the fixed disk, none of them being executed, thus, no possibility for a virus to become active. There are several such rescue operating systems freely available for download. This tutorial describes the usage of Kaspersky Rescue Disk 18, a Gentoo Linux based rather complete and all graphical operating system, including the Kaspersky antivirus engine, with full support of updating the virus databases using your usual Internet connection adapter. You can download the ISO from the Kaspersky Rescue Disk 18 website. If your computer has a CD- or DVD-drive, you can burn the ISO onto a CD-ROM; there are several freeware burning applications available on the Internet. If your computer doesn't have a CD-drive, you'll have to create a bootable USB flash drive. On Windows, this may be done, for example, using the freeware application Rufus. If you need help with this, you may want to have a look at the article How to create a bootable USB drive for Kaspersky Rescue Disk on the Kaspersky support site.
The computer normally boots from the first local disk, thus, we have to tell it that we'll want to boot from the CD or the USB stick. The boot order, i.e. the order in which the computer looks on the different storage devices to find a bootable operating system, is set in the computer's firmware. To enter firmware setup, you have to press a specific computer-setup keyboard key at the start of the booting process (just after powering on the machine). This key is often F2, sometimes Delete, on my HP ProBook it's F10. If your computer uses BIOS-boot, pressing the computer-setup key (at the appropriate moment) will open the BIOS setup utility. Open the Boot tab and move the CD-drive (or the item "removable devices") to the top of the list. Don't forget to save the new settings before leaving BIOS setup. If your computer uses UEFI-boot (what is the case for nearly all modern operating systems), pressing the computer-setup key opens UEFI firmware setup. You'll find, somewhere within the configuration, an item called Boot sequence, where you can change the boot order, similarly to how you would do with BIOS setup. A simpler way to boot from the CD-ROM (or the USB-stick) would probably be the usage of the boot-menu keyboard key (F12 on my Dell G3, F9 on my HP ProBook), that, pressed at the start of the booting process, displays a menu, from which you can choose the device to boot from (as a difference with changing the boot order, this is a one-time boot from the CD-ROM and the next time you power on the computer, it will boot from the local disk again). Have a look at your computer's user manual, which key you'll have to press in order to display the boot menu. Maybe that you have to change the UEFI firmware settings to enable the usage of the boot-menu key.
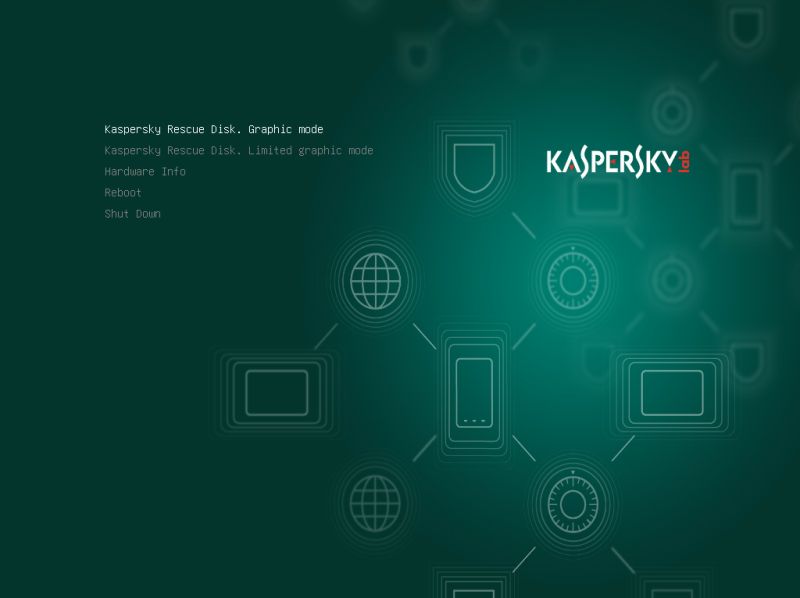
The computer's boot order being changed (with CD-drive or USB stick as first boot device) and the CD-ROM containing the Kaspersky ISO (respectively the USB stick containing the rescue disk image) mounted, power on the computer. The Kaspersky rescue OS starts up, asking you to select a language (English or Russian), then displays a menu, with the actions that you can take. Normally Kaspersky Rescue Disk. Graphic mode should work fine.
 |
The operating system is now initializing. If your computer uses DHCP for network (Internet access) configuration, there shouldn't be a problem and all should be done automatically. If you use manual network settings, you'll have to configure the rescue OS; if you need help, have a look at the article How to set up an Internet connection in Kaspersky Rescue Disk 18 on the Kaspersky support site.
The Rescue Tool is launched automatically and the Ready to scan window is displayed. Starting the scan now is not really meaningful: As indicates the message at the top of the window, the virus databases are out of date. Thus, first, update the virus definitions, by clicking the Update now link. A terminal opens and the virus databases are updated; the new virus definitions will be stored into a newly created folder on the local disk (cf. further down in the text).
![Kaspersky Rescue Disk 18: Updating the virus databases before running the scan [1] Kaspersky Rescue Disk 18: Updating the virus databases before running the scan [1]](../screenshots/krescue2a.jpg)
|
![Kaspersky Rescue Disk 18: Updating the virus databases before running the scan [2] Kaspersky Rescue Disk 18: Updating the virus databases before running the scan [2]](../screenshots/krescue2b.jpg)
|
The system re-initializes and when the Ready to scan window of the Rescue Tool shows up, the message concerning the virus databases has gone. You can now run the scan with default settings, or click the Change parameters link to choose what objects you actually want to be scanned. With default settings, only the most vulnerable objects will be scanned. I think, you should at least also include the system drive. To be sure to have a (nearby) 100% malware-free system, also check All volumes. However, be aware, that this could take a really long time!
![Kaspersky Rescue Disk 18: Selecting the objects to be scanned [1] Kaspersky Rescue Disk 18: Selecting the objects to be scanned [1]](../screenshots/krescue3a.jpg)
|
![Kaspersky Rescue Disk 18: Selecting the objects to be scanned [2] Kaspersky Rescue Disk 18: Selecting the objects to be scanned [2]](../screenshots/krescue3b.jpg)
|
Now we're ready: Push the Start scan button to start scanning the selected objects.
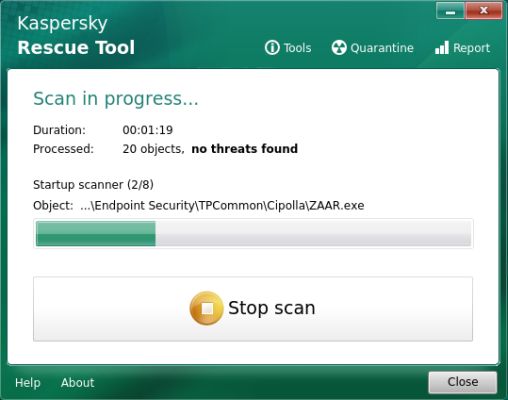 |
The Scan in progress window has a Stop button, that allows to terminate the scan at any moment. Unfortunately, there is no Pause button, that allows to halt the scan and resume it later.
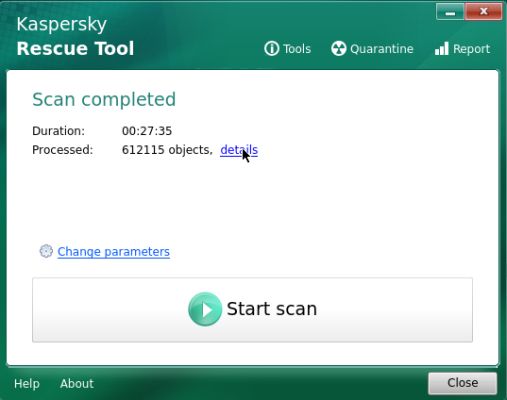
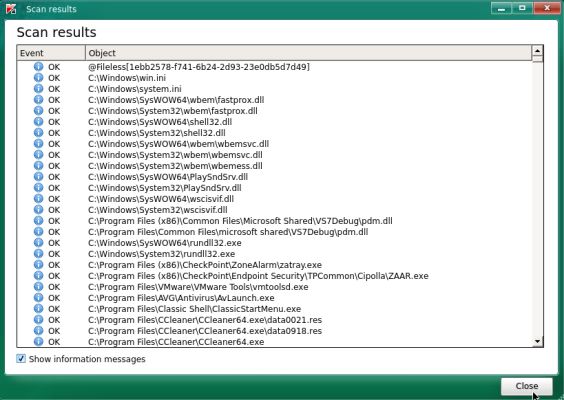
If no potential malware has been found, a window with the title Scan completed is displayed. In this window, you can click the details link to view what objects were scanned and what was the scan result.
|
|
And if there has been some malware detected? In this case, an Objects detected window is displayed and the user has the choice what to do with the potentially malicious files. For details about the possibilities, please have a look at the article How to choose an action to take when a threat is detected in Kaspersky Rescue Disk 18 on the Kaspersky support site.
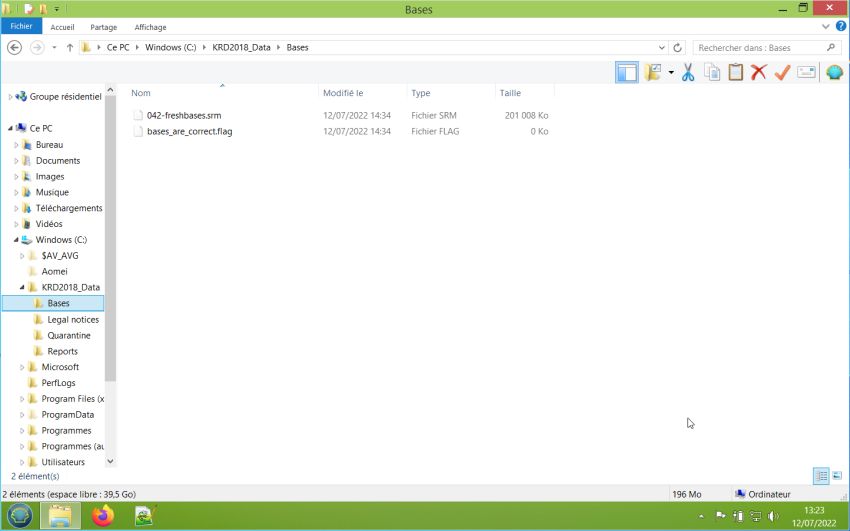
I said above that the newly downloaded virus definitions (virus databases updates) are stored on a local disk. A folder, named KRD2018_Data is created in memory and when leaving the application, it is copied to the local disk, on a Windows system, normally to C:\KRD2018_Data. This folder contains all data collected, downloaded, or produced by Kaspersky Rescue Disk, in particular the virus definition updates and, in the case of an infection, the quarantine folder, but also the scan reports, hardware information and other data. For details, have a look at the article Local data storage in Kaspersky Rescue Disk 18 on the Kaspersky support site.
This data remains within the windows filesystem after Kaspersky Rescue Disk has been shut down. "The user is personally responsible for ensuring the safety of the data collected, and in particular for monitoring and restricting access to the collected data stored on the computer.", they write on the Kaspersky website. Thus, if you are not alone to use the computer, you should make sure that other users can't access the data. Maybe, it would be a good idea to exclude them from being scanned by your Windows virus scanner (just to be sure, that they aren't changed by it)? There is also the possibility to remove the anti-virus databases, as well as to remove all Kaspersky Rescue Disk data. Have a look at the article How to remove traces of Kaspersky Rescue Disk 18 on the Kaspersky support site to learn how to proceed.
When you are done with Kaspersky Rescue Disk, use Leave in the "Start menu". In the pop-up window, choose Restart. As soon as the computer boot process has started, press the computer-setup key on the keyboard, enter firmware setup and reset the boot order to its default values (on a Windows pre-installed machine, normally "Windows boot loader" first, then the local disks, then the CD-drive (if there is any). Your windows operating system should now start up as usual. The screenshot below shows the Kaspersky folders in Windows 8.1 file explorer (French version).
 |
If you find this text helpful, please, support me and this website by signing my guestbook.